Warning
Product support for the Creative Solutions Accounting platform ended on September 30, 2020.
Help & How-To Center content for the Creative Solutions Accounting platform may be outdated and is used at your own risk.
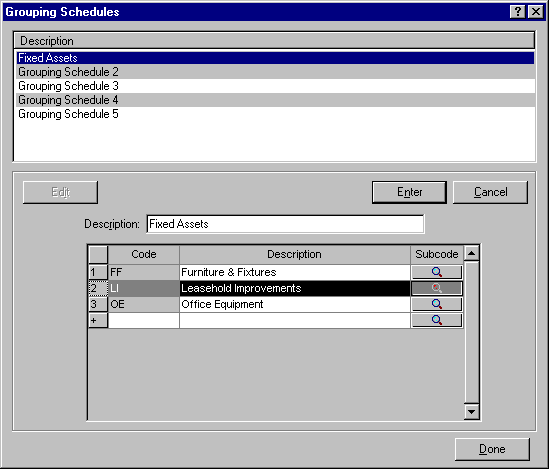
- Choose Setup > Grouping Schedules.
- In the Grouping Schedules list pane, highlight the grouping schedule that you want to modify or delete and then click the Edit button.
- Delete the schedule, code, or subcode:
To delete an entire grouping schedule, including codes, subcodes, categories, and (if applicable) the customized description
Click in the Description field (above the code grid), press F3, and then choose Delete all codes and related subcodes from the context menu. At the confirmation prompt, click the Yes button to confirm that you wish to delete all codes and all of its related subcodes and categories for the current schedule. Note that if previously customized, the grouping schedule description will now revert to its generic default.
To delete a single grouping schedule code and all of its subcodes and categories
Highlight the row in the grid for the desired code by clicking the number button for that row, and then press the DELETE key on your keyboard. At the confirmation prompt, click the Yes button to confirm that you wish to delete the selected code and all of its related subcodes and categories.
To delete one or more subcodes for an individual grouping schedule code (rather than an entire grouping schedule code)
Highlight the row in the grid for the desired code by clicking the number button for that row, and then click the
 button on that row. In the Grouping Schedule Subcode dialog, highlight the row for the subcode you want to delete and then press the DELETE key. At the confirmation prompt, click the Yes button and then click OK to return to the Grouping Schedules dialog.
 - Click the Enter button to save the changes you have made.
- Click the Done button to close the Grouping Schedules dialog.
Was this article helpful?
Thank you for the feedback!


