
 Workpapers CS

We moved!
Help articles have been migrated to the new Help and Support. You can find help for your products and accounts, discover FAQs, explore training, and contact us!
Follow these steps to change a client from a calendar year end to a fiscal
In this example, you set up a new client with a quarterly period frequency and a calendar year end date of 12/31/16. Two journal entries in the 03/31/16 quarterly period were added — one dated 02/28/16 and
Note: A true Short Year cannot be created in the application.
Before doing the following steps, you may want to make a backup of the client using the Client Data Management Utility.
Assume that you initially set up the client with an incorrect calendar year end and the correct fiscal year end date should have been 06/30/16. Follow this procedure to correct it.
- Choose Setup > Clients and click the Accounting Information tab.
- Click the Edit button to make the client record available for editing.
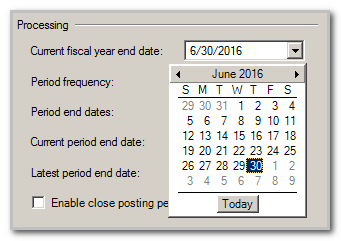
- In the Current fiscal year end date field, enter or select 06/30/16. Show me.
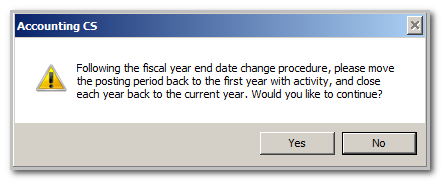
- When you move to the next field, the application opens a warning reminding you to move the posting period back to the first year with activity, and close each year back to the current year. Since there is only current year activity in this example, once this procedure is done, closing prior years will not be necessary. Click yes to continue. Show me.
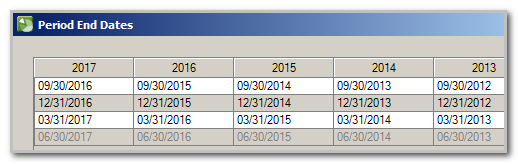
- When you change the date, the application opens the Period End Dates dialog, and to display how the change affects the current, future, and prior years. In this example, the dates are correct. In other instances, you may need to modify dates. Click OK to continue. Show me.
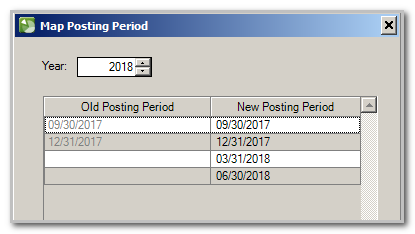
- The Map Posting Periods dialog will open next, containing a list of where the application will place the previously entered transactions and balances after the change. The moved transactions retain their original transaction date. To preview the posting periods for another year, select the year from the Year field. For this example, both transactions will remain in the 03/31/16 posting period. Click OK to continue. Show me.
- Click enter to save your changes.
- Important! If there are any transactions dated for prior years, you will need to re-close all of the years by changing the period to the earliest year that has transactions. Choose Actions > Change Posting Period to change the posting period and bring the client forward to the current year. If you skip this step, the balances on the Enter Trial Balance screen may not match the balances displayed on reports and financial statements.
Because the client in this example has current year transactions, there are no further steps to take.
Workpapers CS. Once complete, you may need to update the Period ending date in the Engagement binder properties.
Notes
- The current processing period must be in the latest fiscal year or the application will not save the changes made in this field.
- The date in the Latest period end date field must be before the new fiscal year end date (for this example, before 6/30/16).
- If you select a fiscal year end date that is before the latest period end date, you will receive the message: The fiscal year end date cannot be before the latest period ending date. If the latest period end date has already been advanced past this date, move the current period end date to the next fiscal year. For this example, you would move to 7/31/16 and change the fiscal year end date to 6/30/17.
- Once all of the above steps are completed, use the Actions > Change Posting Period dialog to move the client to the desired posting period. Editing the Accounting Information tab on the Setup > Clients screen is not the proper way to change posting periods.
Was this article helpful?
Thank you for the feedback!

|
Get the most out of your Thomson Reuters Tax & Accounting products. Our continued learning packages will teach you how to better use the tools you already own, while earning CPE credit. Learn more. |

|
|

|
Chat - Best option for simple questions Call us at +1 800 968 0600. You might like to see our hours and menu options before calling |