We moved!
Help articles have been migrated to the new Help and Support. You can find help for your products and accounts, discover FAQs, explore training, and contact us!
Although conditional expressions are not supported in title rows, you can customize title rows by adding conditional expressions in a row above the title row.
To open a report or financial statement layout for editing, choose File > Report Designer. In the Reports list frame, click the plus (+) sign next to the document type folder to expand the list, and then double-click a report or financial statement layout to open it in the design grid.
Prior to making changes to a financial statement we recommend that you save the original copy by choosing File > Save As to save the report with a different name. To restore a predefined report in which changes have been made, you can choose File > Restore Default.
The following example describes how to display different column headings based on the client’s current period.
Income Statement – Current Year – Prior Year
-
In the design grid of the Report Designer, select row 1 by clicking on the row number, and then choose Insert > Row > Above.
-
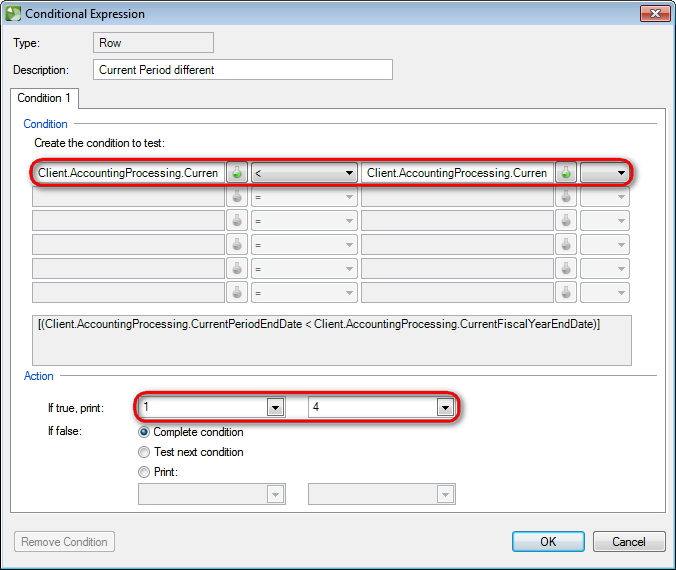
With row 1 highlighted, choose Insert > Conditional Expressions.
- Create a conditional expression that prints rows 1 through 4, if the variable [Client.AccountingProcessing.CurrentPeriodEndDate] is less than (<) the variable [Client.AccountingProcessing.CurrentFiscalYearEndDate].
- Select rows 1 through 4 in the design grid, and choose Edit > Copy.
- Select row 5 and choose Edit > Paste.
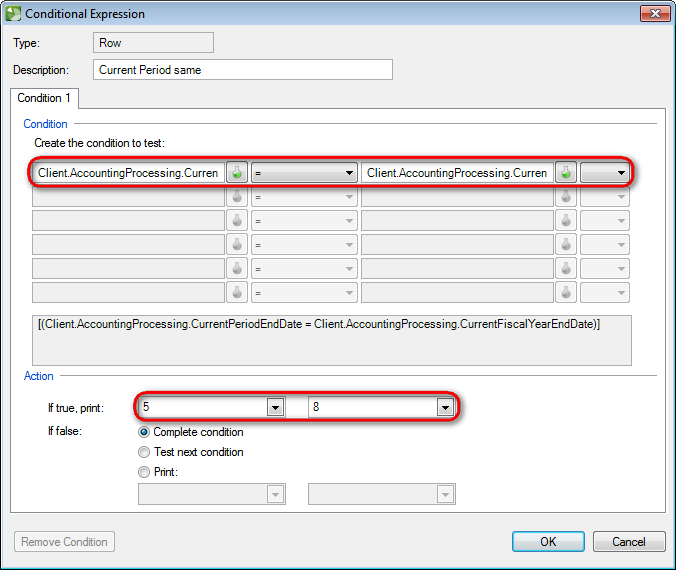
- With row 5 highlighted, choose Insert > Conditional Expressions.
- Create a conditional expression that prints rows 5 through 8, if the variable [Client.AccountingProcessing.CurrentPeriodEndDate] is equal (=) to the variable [Client.AccountingProcessing.CurrentFiscalYearEndDate].
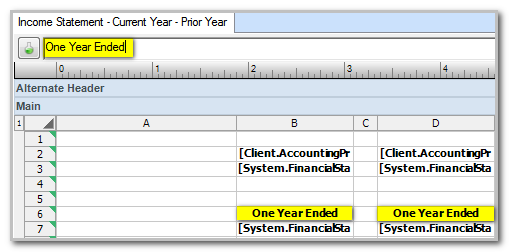
- Select cell B6, remove the variable and enter One Year to change the contents of the cell to One Year Ended.
- Repeat for cell D6.
- Save the report changes by choosing File > Save As.
Was this article helpful?
Thank you for the feedback!


 Workpapers CS


