


We moved!
Help articles have been migrated to the new Help and Support. You can find help for your products and accounts, discover FAQs, explore training, and contact us!
Background
The American Rescue Plan Act of 2021 extends and expands some of the federal tax liability credits that were made available due to the Coronavirus pandemic.
This article explains how to create liability credits for the employer share of employee healthcare costs related to paid sick or family leave taken after March 31, 2021. The employer share of the employee's healthcare costs is not part of the payroll check calculation process, therefore it's not something that Accounting CS can automatically calculate for you.
Creating the liability credit amount for the employer healthcare amount
- Choose Actions > Manage Payroll Liabilities
- Click the Add Liability button.
- Select 941/943 - Internal Revenue Service in the Vendor field.
- Select FIT ARPA Tax Adj in the Item field
- Enter notes in the Notes field (optional).
- Enter the transaction date. This should match the payroll check date in which the ARPA paid leave was used.
- In the Amount field, enter a negative amount matching the employer healthcare amount.
- Click OK.
Applying the credit amounts
There are three options for using your credit amounts.
- Save the credit amount and use it when you file a future 941 form.
- File Form 7200 - Advance Payment of Employer Credits Due to COVID-19.
- Add together the employer healthcare cost amount, the FICA-SS and FICA-MED credits to the ARPA gross pay amount, and apply the total to your federal tax deposits. This option is explained below.
Applying the credits to your federal tax deposit
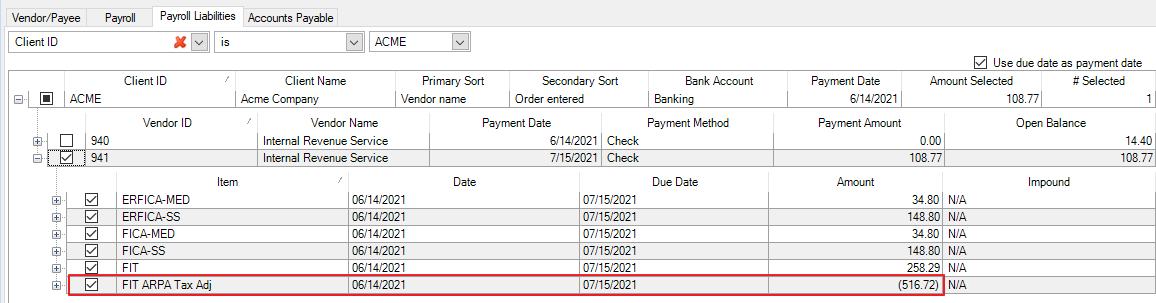
- Choose File > Print Checks, and click the Payroll Liabilities tab. Or, if you are impounding your tax payments, choose Actions > Manage Impound Payments.
- Click the + sign to expand the 941 or 943 row.
- Mark the checkboxes for the liabilities to pay, and mark the checkbox for the FIT ARPA Tax Adj item to apply the credit to the amount due. Show me.
- Click Print Selected.
Separating the liability credit amounts
You can't print a negative liability check, so if the credit amount exceeds your liabilities in the Payroll liabilities tab of the Print Checks screen, follow these steps to separate the credit into two liability credits.
- Choose Actions > Manage Payroll Liabilities (with the appropriate client selected).
- Click the + sign to expand the 941 or 943 row.
- Make note of the FIT ARPA Tax Adj negative liability amounts. You'll need to subtract the liability amount due from this total in a later step.
- Mark the checkbox(es) for the FIT ARPA Tax Adj negative liabilities, and click the Delete Selected button.
- Click the Add Liability button.
- In the Add Liability dialog, select 941/943 - Internal Revenue Service in the Vendor field.
- Select FIT ARPA Tax Adj in the Item field
- Enter the transaction date. This should match the payroll check date in which the ARPA paid leave was used.
- In the Amount field, enter a negative amount that matches the 941/943 liability amount due.
- Click OK.
- Choose File > Print Checks and click the Payroll Liabilities tab or choose Actions > Manage Impound Payments (if impounding).
- Mark the liability credit amount that matches the payment due (creating a zero balance due).
- Click Print Selected (or Pay Selected).
- Repeat steps 1-10 to create a liability credit for the remainder balance of the ARPA credit.
Was this article helpful?
Thank you for the feedback!

|
Setting up and using ARPA paid sick leave |

|
Get the most out of your Thomson Reuters Tax & Accounting products. Our continued learning packages will teach you how to better use the tools you already own, while earning CPE credit. Learn more. |

|
|

|
Chat - Best option for simple questions Call us at +1 800 968 0600. You might like to see our hours and menu options before calling |