We moved!
Help articles have been migrated to the new Help and Support. You can find help for your products and accounts, discover FAQs, explore training, and contact us!
You can easily send or export a report to an Excel spreadsheet.
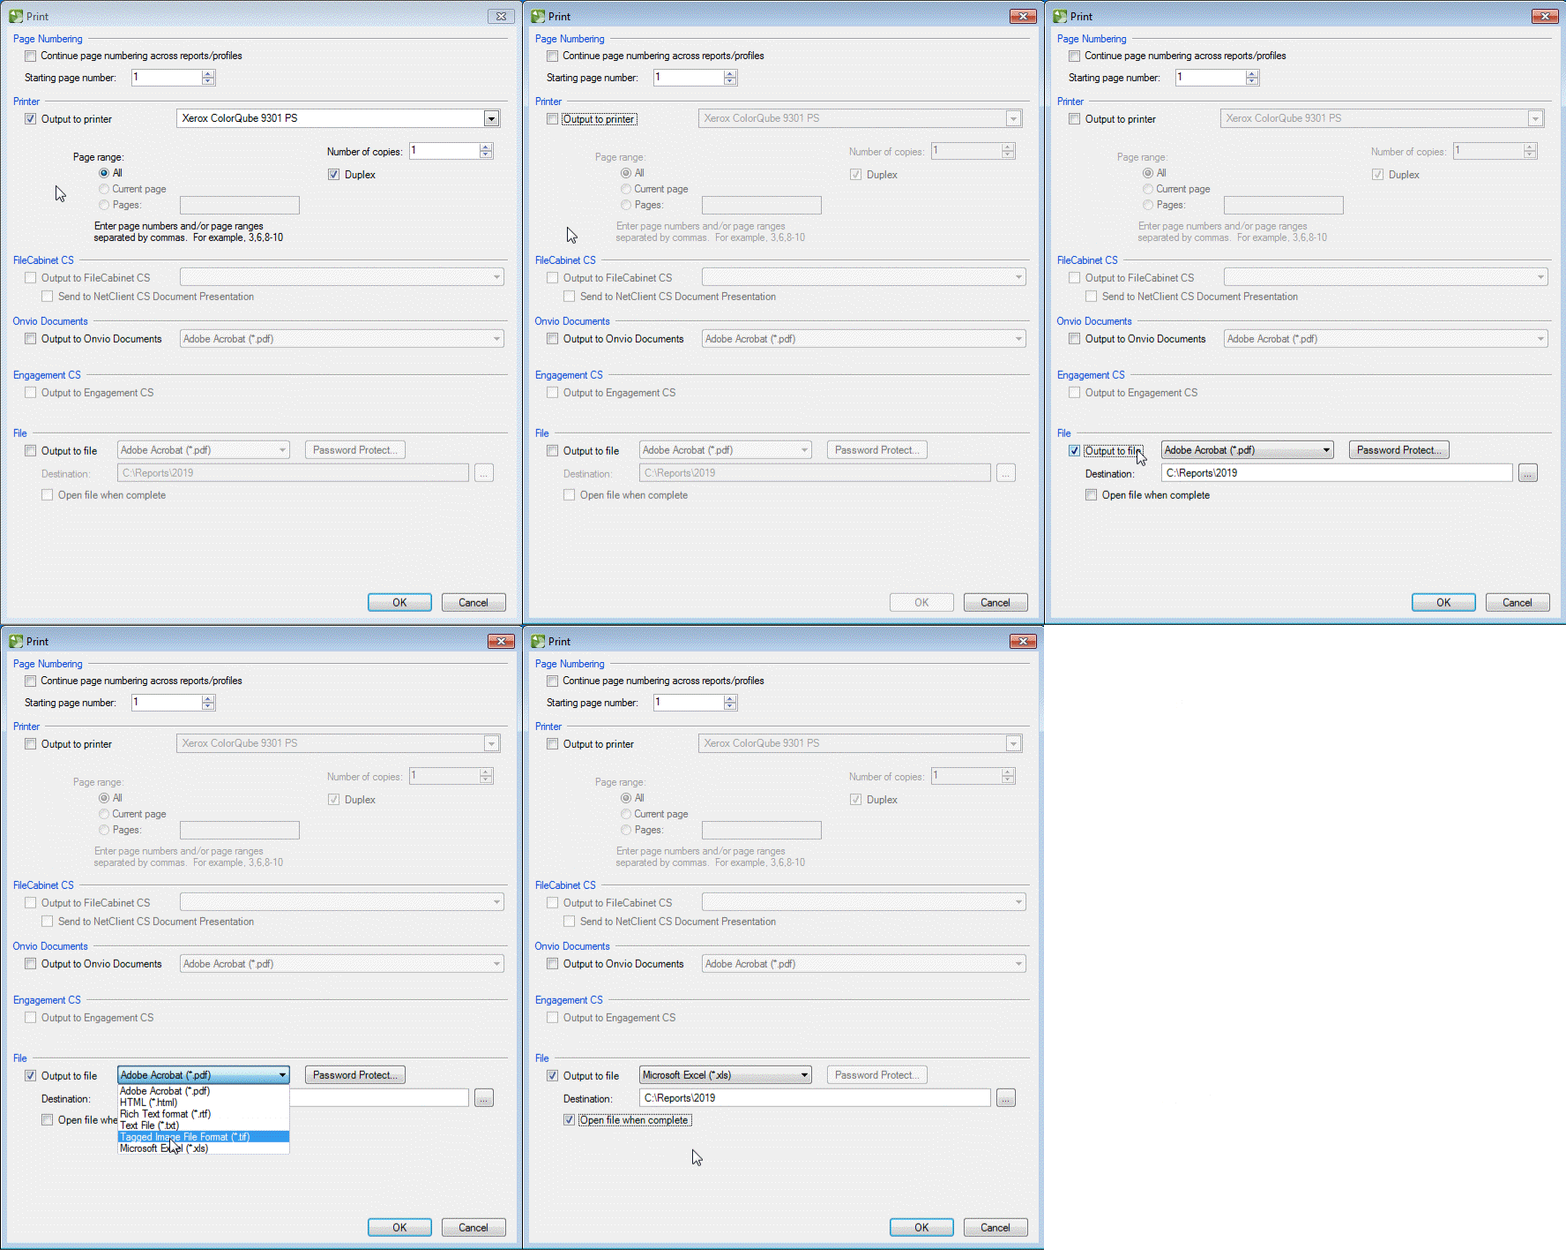
- In the File > Print Reports screen, select the report and specify the report options as usual.
- When you are ready to print (export) the file, click the Print Selected button.
- In the Printer section, clear the Output to printer checkbox.
- If the Output to... checkbox is marked in any sections other than the File section, clear those checkboxes also.
- In the File section, mark the Output to file checkbox.
- Select Microsoft Excel (*xls) from the drop-down list next to the checkbox.
- Double-check the Destination file path and, if necessary, click the Ellipsis
 button to specify where to save your .xls file.
 - To view the resulting Excel file once it has been created, mark the Open file when complete checkbox.

Was this article helpful?
Thank you for the feedback!


