


Warning
Product support for the Creative Solutions Accounting platform ended on September 30, 2020.
Help & How-To Center content for the Creative Solutions Accounting platform may be outdated and is used at your own risk.
- In the Tasks > Transaction Entry window, click the Checks and Deposits tab.
- In the Checks and Deposits grid, enter the Deposits Reference (in the Reference field on this grid and as assigned in the General Ledger tab of the File > Client Properties dialog), date, account, amount, and description.
- If there are additional distributions for any transaction, press TAB to move to the Additional Distributions grid.
Note: If you record multiple distributions to the checking account on one TAB entry, it will appear as a lump sum during Bank Reconciliation unless the option Display multiple distributions to the checkbook GL account in a single transaction separately is selected on the Bank Reconciliation Options dialog.
- To save each transaction, click the Enter button or press the ENTER key on your keyboard.
- Repeat steps 2 - 4 above for each deposit you wish to record for a selected checkbook.
Note: To speed data entry when you are entering deposits, the application automatically duplicates the deposit reference (as defined in the General Ledger tab of the File > Client Properties dialog).
- Press ALT+B (or CTRL+B) to create the balancing entry for the transactions you have entered.
To see deposit entries separately during Bank Reconciliation: (1) Enter each deposit to the checking account as a separate record but enter only a single balancing entry for the credit amount.
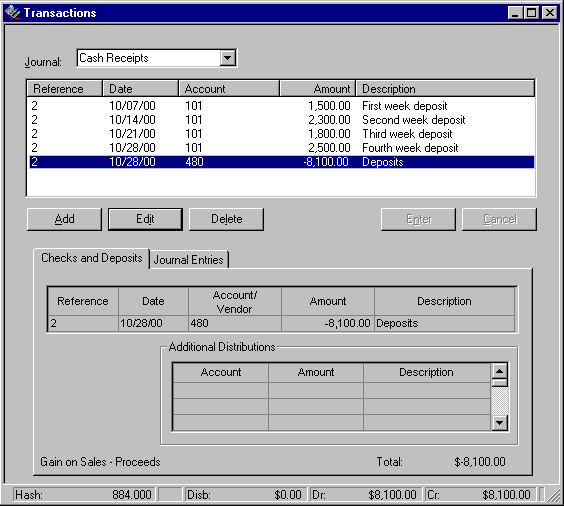
Note: If appropriate, the balancing entry can be distributed to multiple accounts using the Additional Distributions grid.
See also: Using the ENTER key to move between fields in the Transactions window
Was this article helpful?
Thank you for the feedback!