


Warning
Product support for the Creative Solutions Accounting platform ended on September 30, 2020.
Help & How-To Center content for the Creative Solutions Accounting platform may be outdated and is used at your own risk.
Engagement CS integrates with Microsoft Excel to allow CSA Trial Balance information to be linked from within Excel workpapers. Engagement CS provides a convenient toolbar and variable toolbar within Excel that combines the reliable linking of data from Engagement CS to Excel and the ability to use Excel's formatting and calculating features that are already familiar to you.
Notes:
- You must have Microsoft Office 2010 or higher (with the latest service packs installed) to take advantage of the integration features with both Microsoft Excel and Word in Engagement CS.
- For Office 2010 or higher, the integration with Microsoft Office is supported on the 32-bit version of Office. However, due to compatibility issues with existing 32-bit applications and add-ins, we do not support the 64-bit version of Office at this time.
Opening an Excel workpaper
There are two methods for opening an Excel workpaper created in Engagement CS:
- Within Engagement CS
Double-click on the workpaper in the Tree View (or right-click and choose Open from the context menu) to open the Excel workpaper within the Document View window in Engagement CS. Opening the workpaper within Engagement CS allows you to view other workpapers, notes and journal entries in the engagement without having to switch from CSA back to Engagement CS. Most of Excel functionality is available, but a few items, such as page setup and print preview, are not available. It is recommended that the workpaper is opened outside of Engagement CS to take full advantage of Excel's functionality. - Outside of Engagement CS
Right-click on the workpaper in the Tree View and select Open with Excel to open the workpaper outside of Engagement CS. Opening the document outside of Engagement CS gives you complete Excel functionality.
Notes:
- By default, double-clicking a workpaper will open the workpaper in the Engagement CS workspace. You can change the double click option to open workpapers outside of Engagement CS by choosing Setup > User Preferences > Engagement CS and marking the Use double click to open workpaper outside of Engagement CS checkbox.
- To take advantage of the CSA add-in capability in Excel, workpapers should only be opened through Engagement CS and not directly from within Excel.
Engagement CS Menu
Use the Engagement CS menu in Excel to access the following options.

- Insert Multiple Formula - Allows you the ability to add, subtract, multiply, or divide two or more CSA formulas together.
- Clear During Roll Forward - Use this option to select cells that contain information (such as workpaper reference, tickmarks, or procedure completed signoffs) and flag those cells to be cleared when the workpaper is rolled forward into next year's engagement.
Note: Signoffs and workpaper references entered in PPC's Checkpoint Tools will automatically be removed during the roll forward process. These fields do not need to be cleared during roll forward. - Recalculate - Recalculates the workpaper to include changes made to the Trial Balance or journal entries in the CSA client since the Excel workbook was last opened and created.
Note: Integration with Excel is a one-way link from the CSA client database in Excel. The Excel workpaper refreshes automatically when it is first opened in Engagement CS. Subsequent updates made to the client's database in CSA, while the Excel workpaper is open, are reflected in the workpaper when you click the Recalculate option. - Hide/Show Zero Balance Rows - Use this option to hide or show zero balance rows on the Excel spreadsheet. Affected rows will remain hidden or shown until this action is performed again, even if balances change.
- Insert Workpaper Link - Inserts a hyperlink to another workpaper within the current engagement.
- Tickmarks - Inserts a tickmark created in Trial Balance CS into the workpaper.
Note: Tickmarks can be setup in Engagement CS under Setup > Tickmarks. - Tickmark Legend - Inserts a tickmark legend in the document for the tickmarks that have been defined for the current client.
- Procedure Completed - Inserts the current staff member's ID and the date in the cell specifying that the workpaper was completed by the staff member.
- Check Mark - Places a checkmark in the workpaper or document.
- N/A - Inserts a not applicable (N/A) status in the workpaper or document.
- Help - Opens specific help for Engagement CS integration with Excel.
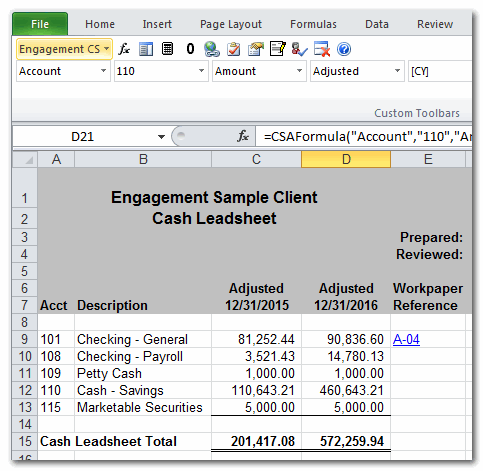
Engagement CS Variable toolbar
The Variable toolbar appears below the Engagement CS menu in Excel. With this toolbar you can create CSA formulas that link directly to the CSA client data for which you are creating the workpaper. The Variable toolbar consists of eight drop-down lists and allows you to insert the following Text and Amount variables:

Note: Amount variables can be selected for different basis, different periods, years, departments and locations.

Using the drop down lists in the Variable toolbar
- Variable Type - Select the type of variable that you would like to insert.

- Variable Name - The options in this drop down list will vary depending on which Variable Type is selected in the first drop down list.
- Type - When the Variable Type selected is either a Grouping Schedule or Account, this drop down list allows you to choose to insert the Amount, Description, or Account number / grouping code / subcode of the Variable name selected in the second drop down list. Use the remaining drop down lists to define the amount that you want to insert in the cell.
- Basis - Choose from Unadjusted, Adjusted, Report, Tax, Other, Budget, Adjusted Budget, Adjusting JE, Reclassifying JE, Other JE, Tax JE, Potential JE, and Budget JE. (The journal entry options display the total of all journal entries specified for the selected type.)
- Period - Select the desired period from the available periods. This will vary depending on the processing type selected for the client in CSA under File > Client Properties.
- Year - Choose the desired year from the 10 years of data available - the current year plus 9 prior years.
- Location - If the CSA client's Chart of Accounts mask has been set up with Locations under File > Client Properties, choose the desired location, or choose All Locations.
- Department - If the CSA client's Chart of Accounts mask has been set up with Departments under File > Client Properties, choose the desired department, or choose All Departments.
Inserting multiple formulas
The Insert Multiple Formulas dialog allows you to add, subtract, multiple, or divide two or more CSA formulas. Select the Insert Multiple Formulas button on the toolbar to open the dialog. The drop down lists available in this dialog are the same as the drop down lists available on the toolbar.

53288058
Was this article helpful?
Thank you for the feedback!