Choose the General Information tab of the File > New Client dialog or the File > Client Properties dialog to enter or update the client's name, payroll report name, DBA, address, phone number, EIN, salutation for transmittal letters, and security password.
If your firm uses Payroll CS to process payroll for the client, do not mark the CBS Client checkbox on this dialog. Marking that checkbox would prevent you from being able to set up tipped wages and other calculating payroll items unavailable within CBS.
See also: New Client [File menu], or File > Client Properties [File menu]
Related topics
Setting up a CBS client
Overview of client consolidation
Overview of client consolidation with account balances only Consolidating clients
Overview of the Vendor Checkwriting feature
Fields & buttons
Enter up to 11 alphanumeric characters to represent the unique ID for this client. Do not include any blank spaces or special characters. The application uses all CAPS for this field automatically.
Notes
- The Client ID field is accessible only in the New Client dialog (not in the Client Properties dialog.) If you need to change the ID of an existing client, choose Rename from the File menu.
- If you also process information for this client in Fixed Assets CS or UltraTax CS, you must use the same client ID in all applications.
Enter the client's employer identification number (EIN) or social security number.
- If you enter nine digits without a hyphen, the application assumes you are entering an EIN and automatically includes a hyphen following the first two digits.
- If the client has applied for (but not yet received) an EIN or SSN, enter a single hyphen in this field. CSA will then print Applied for wherever the number is required on forms or reports.
Enter the client's business name as you want it to appear on the financial statements and reports. (The maximum length is 40 characters.)
Note that the Client Name variable is also used for many payroll reports and on the default check layouts.
Tip: You may use the DBA field or the Address Line 1 and Address Line 2 fields to enter secondary business name(s).
The business name you enter in this field will appear on W-2s, 1099s, SUTAs, and other payroll forms.
Note, however, that the Client Name layout variable (rather than the Client Payroll Name variable) is used on the default check layouts, but you could choose to edit a layout and insert the Client Payroll Name variable instead.
Enter the client's DBA, if any. (The maximum length is 40 characters.) This information appears on printed checks when the corresponding check layout variables are selected.
Enter the client's primary street and/or mailing address. The information in these fields appears on printed checks when the corresponding layout variables are selected, and they are available for use in transmittal letters and mailing labels.
Address information from these fields appears on printed checks.
City
Enter up to 25 characters of text, or select the city from the drop-down list of previously entered cities in this custom fieldview.
State
Enter the two-character state postal code, or select it from the drop-down list.
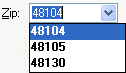
Zip
Enter the client's five-digit or nine-digit zip code, or select it from the drop-down list of previously entered zip codes in this custom fieldview.
Notes
A custom fieldview is similar to a regular fieldview or drop-down list, except that you determine the entries that appear in its drop-down list.
- To add an item to the drop-down list in a custom fieldview, simply enter the item into the field and then press CTRL+S.
- To open a dialog where you may add or edit items in a custom fieldview's drop-down list, place the cursor in that field and then press CTRL+W.
Enter just the digits for the client's area code and telephone number. The telephone number will print on 1099 forms. (The appropriate dashes are added automatically.)
Enter the client's North American Industry Classification System (NAICS) code, or click the  button to open a dialog where you can search for the appropriate code within the complete list of NAICS codes.
Note: Recording the industry code for each of your CSA clients is particularly useful if you plan to transfer client data from CSA to Financial Analysis CS.
Opens the Add/Remove Module(s) dialog for the selected client.
Note: You cannot remove the Payroll Compliance module for a Payroll CS client.
Opens the Advanced Properties dialog, which allows you to enter miscellaneous contact and password information for the selected client and, if appropriate, to deny access to information for this client via the data sharing features and/or FileCabinet CS.
To allow leading zeros in the Chart of Accounts numbering for the selected client, mark this checkbox.
Note: This option cannot be used for a Client Bookkeeping Solution client.
To identify the selected client as a consolidation client (or parent client) mark this checkbox.
Additional notes for a GL client
- When the first consolidation is performed for this client, the Use separate journal in transaction data entry checkbox on the General Ledger tab of the File Client Properties dialog is automatically marked.
- When the first consolidation is performed for this client, a special journal called Consolidation Adjustments is automatically created to be used for any adjusting entries that need to be saved during subsequent consolidations.
Additional notes for a Trial Balance CS client
The Account Balances Only checkbox is available only for a Trial Balance CS client and only if the Consolidation Client checkbox is also marked.
If both checkboxes are marked:
- The Chart of Accounts mask on the General Ledger/Trial Balance tab becomes unavailable (grayed). The mask is set during the consolidation process based on the subsidiary client information.
- Only balances from subsidiary clients will be consolidated, based upon account number or grouping schedule.
- The Non-Payroll Data Only checkbox on the File > Consolidate Clients dialog is automatically marked and made unavailable (grayed). Payroll data is excluded when consolidation is for account balances only.
If the Account Balances Only checkbox is not marked:
Client consolidation can include general ledger, payroll, trial balance, or other relevant information as selected on the File > Consolidate Clients dialog.
For a licensed user of Trial Balance CS
The Account Balances Only checkbox is available only for a Trial Balance CS client and only if the Consolidation Client checkbox is also marked.
If both checkboxes are marked:
- The Chart of Accounts mask on the General Ledger/Trial Balance tab becomes unavailable (grayed). The mask is set during the consolidation process based on the subsidiary client information.
- Only balances from subsidiary clients will be consolidated, based upon account number or grouping schedule.
- The Non-Payroll Data Only checkbox on the File > Consolidate Clients dialog is automatically marked and made unavailable (grayed). Payroll data is excluded when consolidation is for account balances only.
If the Account Balances Only checkbox is not marked:
Client consolidation can include general ledger, payroll, trial balance, or other relevant information as selected on the File > Consolidate Clients dialog.
For a licensed user of Accountant's Assistant
To enable the Vendor Checkwriting features for the selected client, mark this checkbox.
Note: For licensed users of Payroll CS, the vendor checkwriting feature is automatically available.
To identify the selected client as a Client Bookkeeping Solution client, mark this checkbox.
If the client will be using the (noncalculating) payroll features of CBS CheckWriter, also mark the Noncalculating payroll client checkbox.
If your firm uses Payroll CS to process payroll for the client, do not mark the CBS Client checkbox on this dialog. Marking that checkbox would prevent you from being able to set up tipped wages and other calculating payroll items unavailable within CBS.
Additional notes
The Accountant's Assistant module in CSA allows you to set up client information and process the client's exported data in Write-Up CS only for a CBS Windows client (not for a client using the DOS-based Checkbook Solution modules).
To prepare setup information for a CBS client, and to retrieve export data from a CBS client, the following are required:
- You must have a licensed copy of Accountant's Assistant software installed on this machine.
- You must select both the General Ledger module checkbox and the Payroll Compliance module checkbox on the Add/Remove Module(s) dialog. (Selection of other CSA modules is optional for a CBS client.)
After setting up the appropriate information for the CBS client in CSA, choose Utilities > Accountant's Assistant > Client Bookkeeping Solution and complete the relevant setup steps in Accountant's Assistant.
To identify the selected client as a Client Bookkeeping Solution client, mark this checkbox.
If the client will be using the (noncalculating) payroll features of CBS CheckWriter, also mark the Noncalculating payroll client checkbox.
If you will be processing payroll for the client in CSA (rather than in CBS), do not mark either checkbox.
Additional notes
The Accountant's Assistant module in CSA enables you to set up client information and process the client's exported data in Write-Up CS only for a CBS Windows client (not for a client using the DOS-based Checkbook Solution modules).
To prepare setup information for a CBS client, and to retrieve export data from a CBS client, the following are required:
- You must have a licensed copy of the Accountant's Assistant software installed on this machine.
- You must select both the General Ledger module checkbox and the Payroll Compliance module checkbox on the Add/Remove Module(s) dialog. (Selection of other CSA modules is optional for a CBS client.)
After setting up the appropriate information for the CBS client in CSA, choose Utilities > Accountant's Assistant > Client Bookkeeping Solution and complete the relevant setup steps in Accountant's Assistant.


