Warning
Product support for the ended on September 30, 2020.
- Write Up CS
- Payroll CS
- Engagement CS
- Client Bookkeeping Solution
- Financial Analysis CS
Help & How-To Center content for the Creative Solutions Accounting platform may be outdated and is used at your own risk.
Use the General tab of the Vendors window to record the payee name, address, telephone number, name of contact person, EIN, account number, and vendor type.
Note: The Account # field on the General tab is not for the GL account number. Use the Standard check grid of the Distributions tab to set up the default GL account number(s) for the vendor.
To have the program properly calculate and store information required for printing Form 1099 at year end, you must do the following: (1) choose the 1099 recipient option on the General tab, (b) select a 1099 item for the vendor in 1099 distributions grid of the Distributions tab, and (c) select a 1099 item for the vendor in the Standard check grid on the Distributions tab. For a Write-Up CS client, also enter a GL account number on the same line as the 1099 item.
Fields & buttons
Enter the name of the vendor as you want it to appear on vendor checks.
Enter the vendor's street address exactly as you want it to appear on checks and (if applicable) 1099s. The program will use the information in both the Street #1 and Street #2 fields, up to 40 characters on 1099s.
If alternate name and address information is entered on the Address & Accounts tab, that information will be used on all 1099s and checks for this vendor, overriding the information here on the General tab.
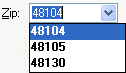
Enter the vendor's street address exactly as you want it to appear on checks and (if applicable) 1099s. (Both the City and Zip fields are custom fieldviews.)
Notes
A custom fieldview is similar to a regular fieldview or drop-down list, except that you determine the entries that appear in its drop-down list.
- To add an item to the drop-down list in a custom fieldview, simply enter the item into the field and then press CTRL+S.
- To open a dialog where you may add or edit items in a custom fieldview's drop-down list, place the cursor in that field and then press CTRL+W.
Enter just the digits for the vendor's area code and telephone number. (The program automatically adds the appropriate dashes.)
When this checkbox is marked, the currently selected vendor will be excluded from all check printing fees.
Enter a unique alphanumeric ID to use for the selected vendor, using up to 11 characters.
Enter the vendor's Employee Identification Number. If the vendor has applied for but not yet received an EIN, enter a single dash. As you tab off this field, the program automatically inserts the words Applied for.
The format automatically defaults to xx-xxxxxxx.
This checkbox is automatically marked when the EIN has been verified using the Vendor TIN Bulk Matching command from the right-click context menu.
Enter the account number (if any) associated with this vendor.
Note: Do not use this field to enter the default general ledger account number for this vendor. That information should be entered instead on the Distributions tab of the Vendors window.
The Payee type setting on the General tab of the Vendors window is used only as a sort key for vendor reports.
Choose one of the following options:
- 1099 recipient
To have the program properly calculate and store information required for printing Form 1099 at year end, you must select a 1099 item for the vendor both in the 1099 distributions grid and in the Standard check grid on the Distributions tab of the Vendors window. For a Write-Up CS client, also enter a GL account number on the same line as the 1099 item.
- Agent
For a Payroll CS or Vendor check printing client, the program will automatically generate an Agent vendor check when you print payroll checks or record handwritten payroll checks that include amounts for any of the GL accounts specified in the GL Account Triggers section on the Address & Accounts tab of the Vendors window.
- Other
Available only for licensed users of InterceptEFT transmission and the Impound feature.
Disclaimer: InterceptEFT is an unaffiliated third party that some of our customers have engaged to provide direct deposit, tax payments, ACH processing, or credit card merchant services.
This field displays only when an Impound checkbook has been specified for the client and either the 3 day or 4 day processing option is marked in the Direct Deposit tab of the Client Properties dialog. Select the appropriate payment type from the drop-down list. Your selection will be reflected in the Reason column of the Utilities > Impound Funding dialog grid and in the EPS file.
- 1099 Payments. This specifies to InterceptEFT that the fund to the Impound account will be paid to a vendor with a personal type bank account. The funding transaction will specify NET PAY as the Company entry description and CSI NET PAY as the Company discretionary data in the ACH file.
Note: This option is not connected to 1099 form printing from within Write-Up CS.
- Tax Payments. This specifies to InterceptEFT that the fund to the Impound account will be paid to a taxing authority such as EFTPS. The funding transaction will include TAX IMPND as the Company entry description and CSI Impound as the Company discretionary data in the ACH file.
- Commercial - other. This specifies to InterceptEFT that the fund to the Impound account will be paid to a vendor with a commercial type bank account. The funding transaction will include BILL IMPD as the Company entry description and CSI Billing as the Company discretionary data in the ACH file.
Related topics
Adding a 1099 recipient, payroll agent, or other vendor
Vendors [Setup menu]


