
 myPay Solutions

This overview provides links for getting employees setup to receive a personal portal registration, how the employees would activate their accounts, how the employees would use their personal web portal and how to manage their online account.
Setup web employee portals
myPay Solutions Direct makes it quick and easy to set up your employees with secure portals through www.mypaysolutions.com to be able to view their paystubs and W2s online.
Follow these steps to setup and help your employees register for their own unique, secure portals using myPay Solutions Direct:
Initial employee setup
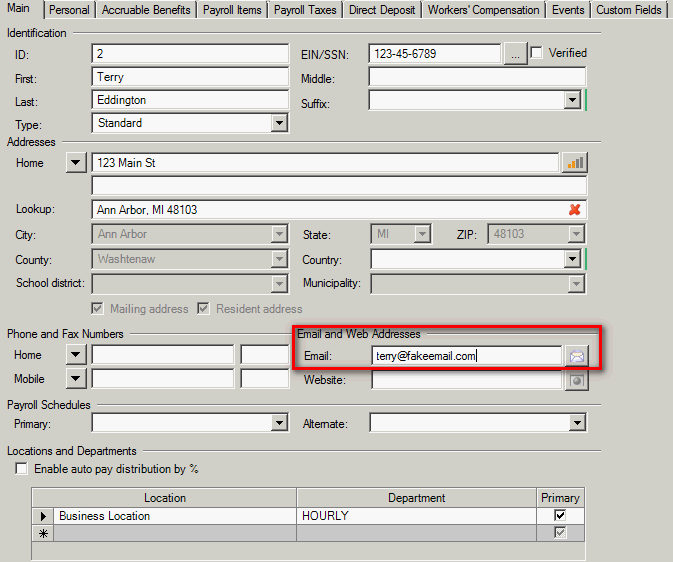
- Under Setup>Employees>Main, access the Email field and enter the employee's personal email address. Show me.
- Once you click Enter to save the employee, an email will automatically be sent from support@mypaysolutions.com asking the employee to register his or her portal.
Note: Because the email is automatically generated, it is often sent to the spam or junk folder of an employee's email. Please ensure employees are checking this folder if they have not received the registration email yet.
Determining whether employee has registered and resending registration email
- In the event your employee says they have not received a registration email, access Setup>Employees>Personal and look at the Send Registration Email button to determine if it is greyed out.
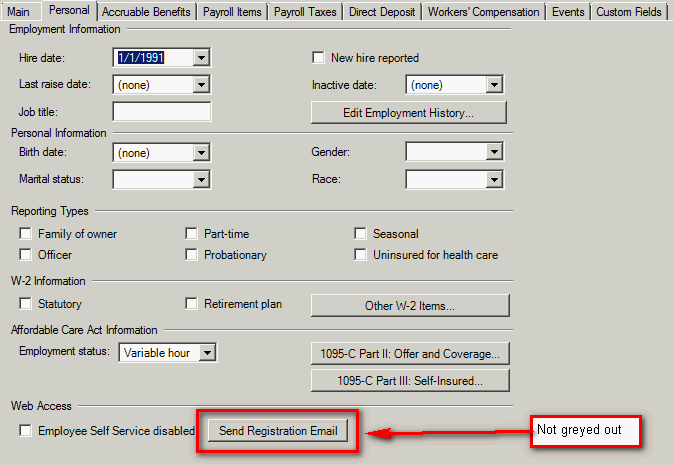
- If the button is not greyed out, select the Edit button or double-click on the employee name to open up the fields for editing. Click the Send Registration Email button to resend the registration email. Once you click Enter to save, an email will automatically be sent from support@mypaysolutions.com asking the employee to register their portal.
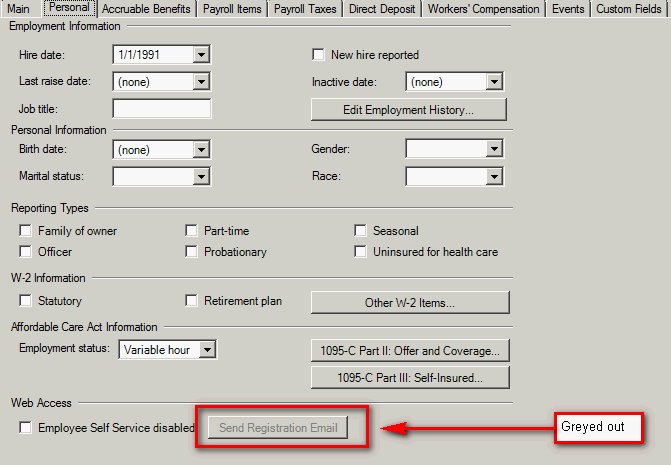
- If the button is greyed out, please make sure there is an email address entered on the Main tab referenced in the instructions above. If the email address is present and the Send Registration Email button is greyed out, the employee has registered his or her account already and a registration email cannot be resent.
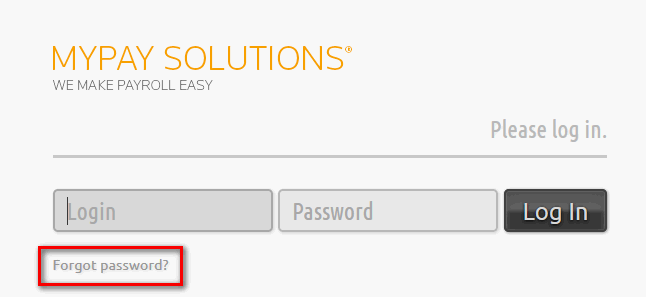
- If the employee has already registered, please direct them to reset their password by accessing www.mypaysolutions.com and clicking Login, then clicking Forgot Password. Show me.
Note: myPay Solutions does not keep employee passwords on file. If an employee has registered but does not remember his or her email address or login to reset the password, please have the payroll contact for the company call your designated Payroll Specialist.
myPay Solutions is not authorized to communicate directly with employees who are not designated as the payroll contact. If you want to designate a person to have authority to call your Payroll Specialist directly, you must add them as a payroll contact that is authorized to access and make changes to your myPay Solutions payroll account.
Registering your web employee portal
You will receive a registration email after your email address has been entered into the myPay Solutions Direct program by your payroll contact. The email will come from support@myPaysolutions.com. Show me.
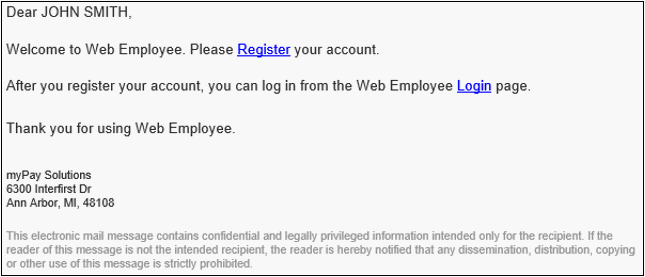
Please ensure it is a trusted email or check your spam if you do not receive it.
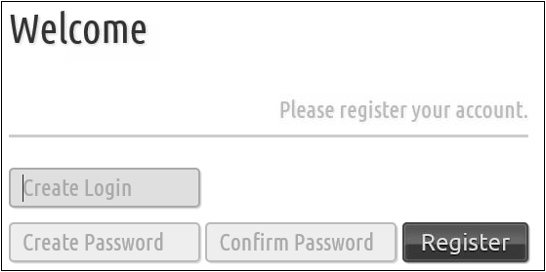
Click the Register link in the email to create your login and password. Show me.
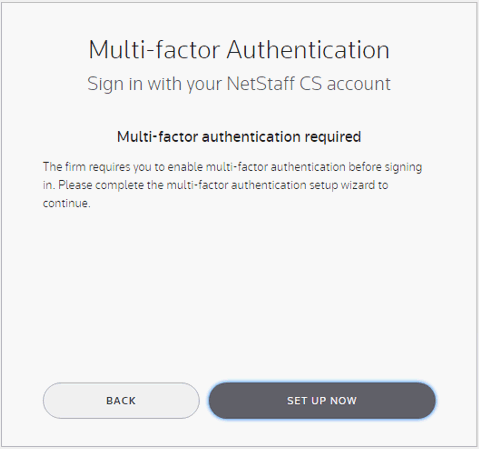
Once the account has been registered, you will need to activate multi-factor authentication to protect your online information. Refer to the Activating MFA tab for assistance.
Accessing your web employee
After activating your account, access your online account by going to mypaysolutions.com and clicking LOGIN in the upper right-hand corner. You can also install the myPay Solutions app from the app store on your device for easier access.
Activating your multi-factor authentication
- After you register your account, you will be prompted to setup Multi-Factor Authentication. Choose the Setup Now option. Show me.
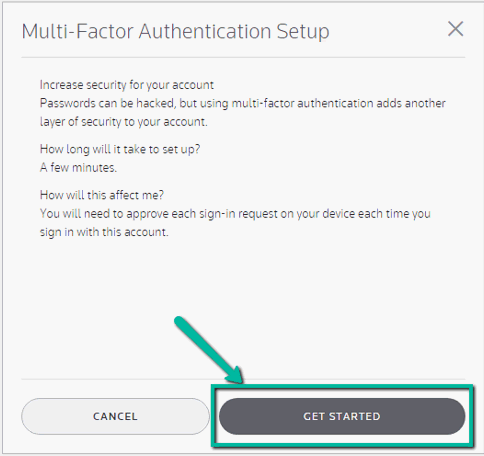
- Select Get Started. Show me.
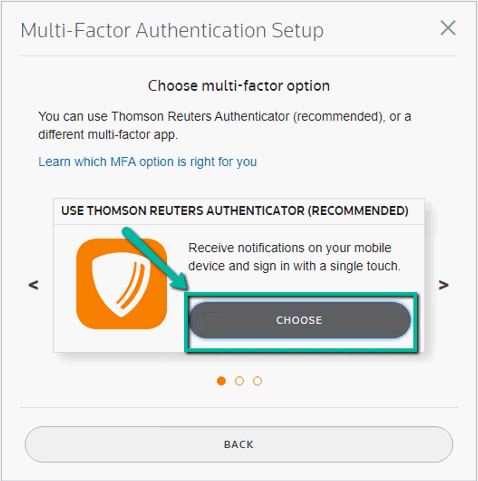
- Choose Thomson Reuters Authenticator (recommended). Show me.
- On the mobile device you’d like to pair, download and install the Thomson Reuters Authenticator app. Enable access to your camera and enable push notifications. Once installed, click Next on your computer. https://cs.thomsonreuters.com/ua/login_security/cs_us_en/mfa-setup.htm#app Show me.
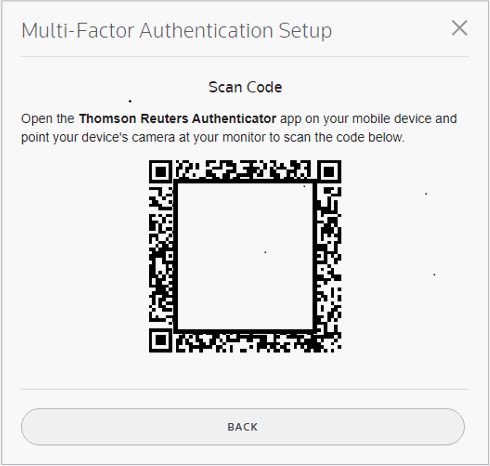
- A QR code will appear on your computer screen. On your mobile device, open up the Thomson Reuters Authenticator app you installed in the previous step and click Scan QR code. If the option doesn’t appear on the main screen with the app open, click the gear icon at the top left corner to open up the settings. You should then see the Scan QR code at the bottom of your screen (orange button). Click Scan QR code and your camera will be activated within the app (you will need to make sure you’ve allowed camera access to the app). Hold your phone up to the computer so the QR code is in view of the camera. Hold the phone close enough and steady enough for the QR code to be read properly by your device. Show me.
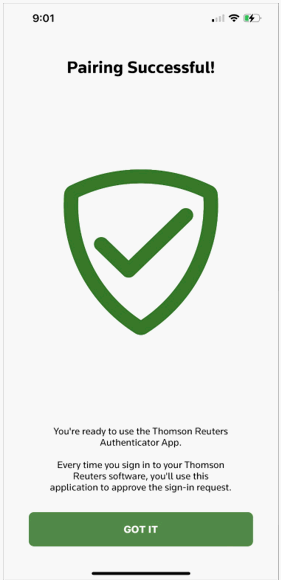
- You should receive a message on both your computer and your phone to indicate that the pairing was successful. On your phone, you can choose to enable face ID or touch ID if your phone has those options. Enabling those options is up to you. Then click Got it. Show me.
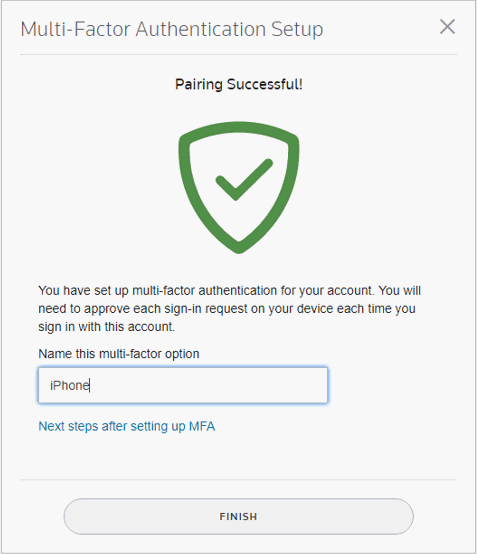
- On your computer, name the multi-factor device you’ve paired and click Finish. Show me.
- On your computer, you will be prompted to check your device to authenticate. Show me.
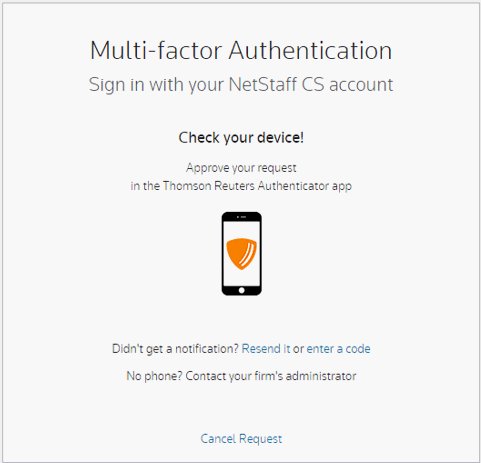
- On your paired mobile device, you should receive a notification from the Thomson Reuters Authenticator app to Approve the sign in (make sure notifications are enabled for the app). Click the green check box to Approve from your mobile device. Show me.
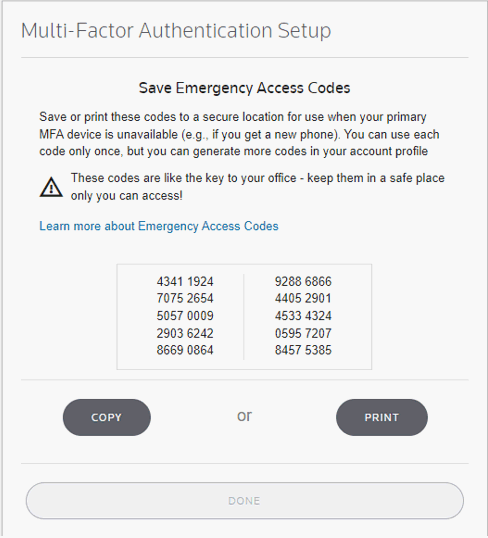
- You will then have an option to copy or print emergency access codes to use if your MFA device is unavailable. Select either the Copy or Print option and then select Done. Show me.


Using your web employee portal
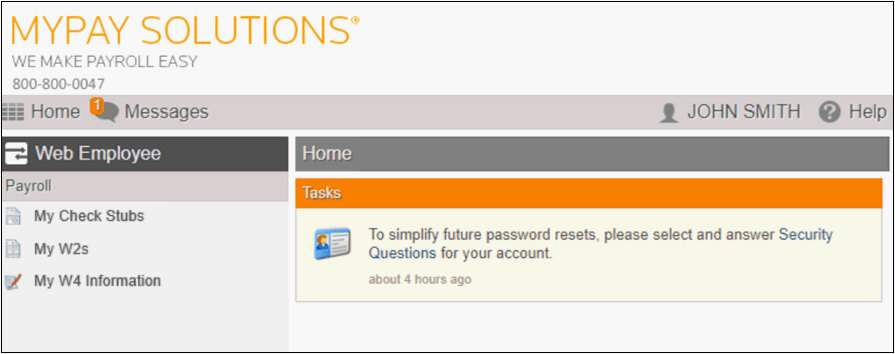
Once the account has been registered, you will have access to your check stubs, W-2s, and the W-4 Information. Show me.
My Check stubs
Select My Check Stubs to view current and past check stubs. Click on one of the checks to review the details. Show me.
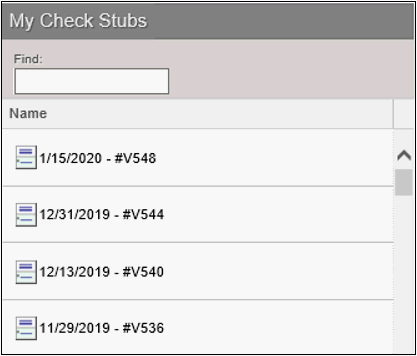
Note: Check stubs are archived after 18 months.
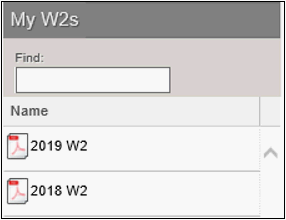
My W-2s
Select My W2s to access your current and past W-2s. Click on the Year to review and print the form. Show me.
It is important to note that while a W-2 will print to the employee's web employee portal, a corrected W-2C will not. This needs to be printed by the company's payroll administrator and given to the employee.
My W4 Information
Select My W4 Information to review and update your W-4 information. This includes your name, email, and federal and state withholding elections. You must tell your payroll administrator that changes were made as they need to review and accept the changes in the software. Show me.

Note: This uses the Federal 2020 W-4 form. Review the Tax Withholding Estimator from the IRS to determine your amounts.
Managing web employee portals
Select your name in the upper right corner of the screen to access the account menu.
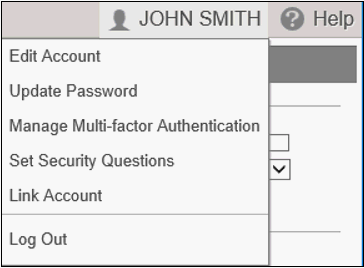
- Edit Account will allow you to update your login, name, and email address.
- Update Password will allow you to update your existing password.
- Manage Multi-Factor Authentication will allow you to setup MFA, link a new device, remove an old device, and print a list of one time use emergency codes in case you get a new phone or do not have your phone on you when you need to log in.
- Set Security Questions will allow you to setup security questions to allow for an easier way to reset your password if you forget it.
- Log Out will close your session.
Was this article helpful?
Thank you for the feedback!