
 Workpapers CS

We moved!
Help articles have been migrated to the new Help and Support. You can find help for your products and accounts, discover FAQs, explore training, and contact us!
You can add workpaper links in the WP Reference column of the Enter Transactions and Enter Trial Balance screens that enable you to launch and view the related workpapers from the client's engagement binder in it's native application (for example, Microsoft Word, Microsoft Excel, and so forth).
See also: Inserting links from the Workpapers CS ribbon in Microsoft Word and Microsoft Excel.
Adding a workpaper link in the Enter Transactions screen
- Choose Actions > Enter Transactions screen to add or update a journal entry.
Note: To add a workpaper link, the transaction type must be a Journal entry and any subtype other than Regular.
- Click the Ellipsis
 button in the WP Reference column to open the Insert Workpaper Link dialog.
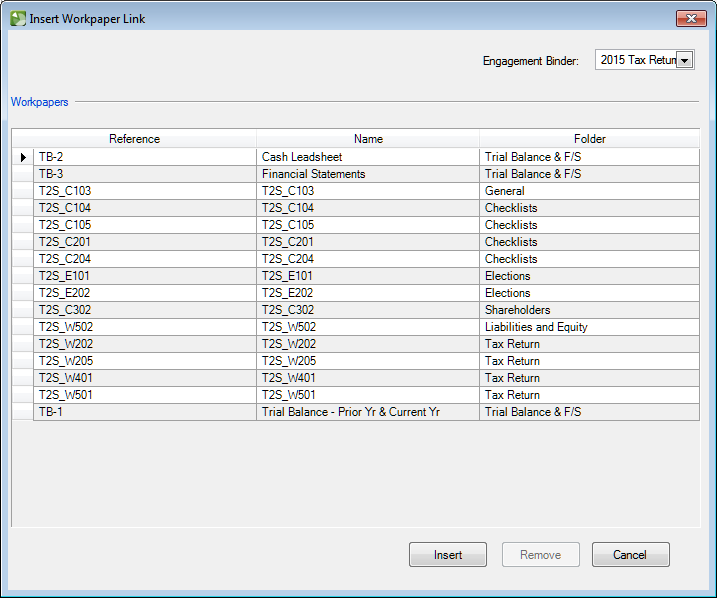
- Select the engagement binder from the Engagement Binder drop-down list that contains the workpaper from which to create a link.
- Click the row in the Workpapers list that contains the workpaper, and then click the Insert button to insert the reference link in the WP Reference column for the transaction.
Adding a workpaper link in the Enter Trial Balance screen
- Choose Actions > Enter Trial Balance and select the client from the client selection field.
- Click the View Maintenance link (in the upper-right corner of the screen).
- In the View Maintenance dialog, select the view and then click the Edit button.
- Click the first blank row (marked by an asterisk) in the Column Order grid and then select Workpaper Reference in the Column Type field.
- Select the appropriate Period and Year in the Column Definition section.
- Click Enter to save the change and then click Done to return to the Enter Trial Balance screen.
- Click the Ellipsis button in the WP Reference column to open the Insert Workpaper Link dialog.
- Select the engagement binder from the Engagement Binder drop-down list that contains the workpaper from which to create a link.
- Click the row in the Workpapers list that contains the workpaper, and then click the Insert button to insert the reference link in the Workpaper Reference column in the selected row of the Trial Balance grid.
Notes
- To delete existing links from the WP Reference column, you can click the Ellipsis button to open the Insert Workpaper Link dialog, and then click the Remove button.
- The first item in the Workpapers list of the Insert Workpaper Link dialog is highlighted by default.
- Links open as read-only if the target of the link is checked out, disconnected, or otherwise in use in the engagement binder.
- Links open in the same format in which the workpaper was created (for example, Microsoft Word, Microsoft Excel, or Adobe Reader).
- Links to PDFs launch in the following manner based on whether the Workpapers Dashboard is open or closed.
- If the Workpapers Dashboard is open, the PDF will launch in the PDF Editor within Workpapers CS.
- If the Workpapers Dashboard is closed, the PDF will open in the default PDF application that is installed on your workstation. The PDF application determines whether or not the PDF is launched in edit mode.
- If you have Adobe Pro installed, the PDF will open in that application with editing enabled.
Was this article helpful?
Thank you for the feedback!

|
|

|
Get the most out of your Thomson Reuters Tax & Accounting products. Our continued learning packages will teach you how to better use the tools you already own, while earning CPE credit. Learn more. |

|
|

|
Chat - Best option for simple questions Call us at +1 800 968 0600. You might like to see our hours and menu options before calling |