New (tax) year, new help!
Fixed Assets and UltraTax CS 2023 help is now on Help and Support. We're still moving articles, but you can find most content for the 2023 tax year there. Continue using the Help & How-To Center for tax years 2022 and older.
The first step to prepare data for conversion from ATX Saber and ATX Max to UltraTax CS is exporting the data in the proper format and preparing the files for our Conversion Team. Complete the steps below to create the files you'll need to provide to convert your data for use in UltraTax CS.
If you are just getting started, check out the Conversion Toolkit before you continue with the steps in this article.
2018 forms and schedules that convert from ATX
If you are converting 2018 data from ATX Saber and ATX Max to UltraTax CS, the following forms will convert.
2017 forms and schedules that convert from ATX
If you are converting 2017 data from ATX Saber and ATX Max to UltraTax CS, the following forms will convert.
Before you provide data to convert
Before you prepare data for conversion, rename, renumber, or modify client IDs to avoid issues in the conversion process. Client IDs must be unique across all entities in UltraTax CS.
Prepare data for conversion
 Prefer a video? Show me
- Create a folder on your desktop where you will export your ATX data.
- Open ATX, and then open the Return Manager window if the window does not open by default.
-
Mark the returns you want to export for conversion, or mark the Mark ALL checkbox to select all of the clients in the current view.
For the most efficient conversion, you should send all data for a given year at the same time.
- On the menu, choose Returns > Export Marked Returns.
- Confirm the clients selected to export in the Export Marked Returns dialog, and then click the Export Marked Returns button.
-
Browse to the folder you created in step 1, and click OK to export your data.
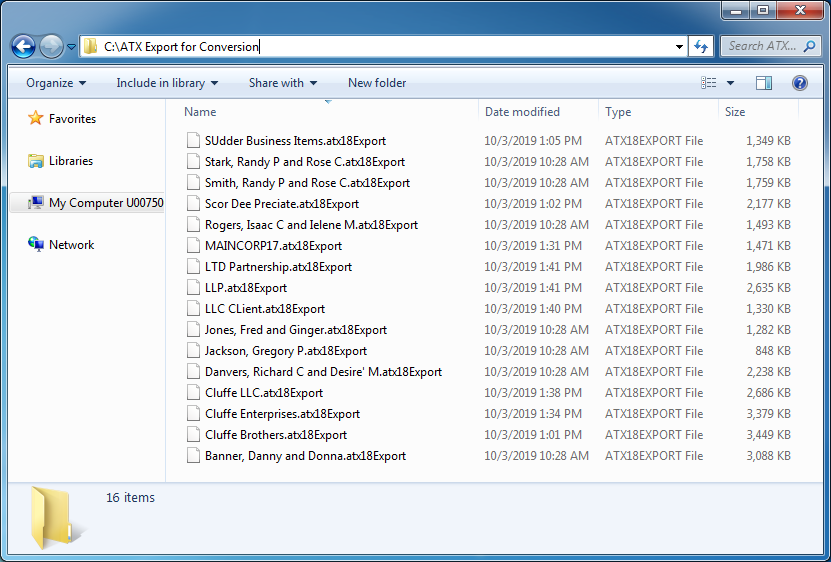
The folder that contains the exported clients should resemble the following.

- Right-click the folder you created in step 1, and select Send to > Compressed zip, or ZIP the folder using your preferred method.
Do not password protect or encrypt the ZIP file. Doing so will result in rejection of your submitted data.
Your data is now ready to be uploaded for conversion to UltraTax CS. Continue the process by setting up a conversion on the tax.tr.com website.
Was this article helpful?
Thank you for the feedback!


