


We moved!
Help articles have been migrated to the new Help and Support. You can find help for your products and accounts, discover FAQs, explore training, and contact us!
For payroll compliance (annually licensed)
Follow this procedure only if you want to override information that is automatically entered by the application based on retrieved information.
- Choose Actions > Edit Payroll Tax Forms.
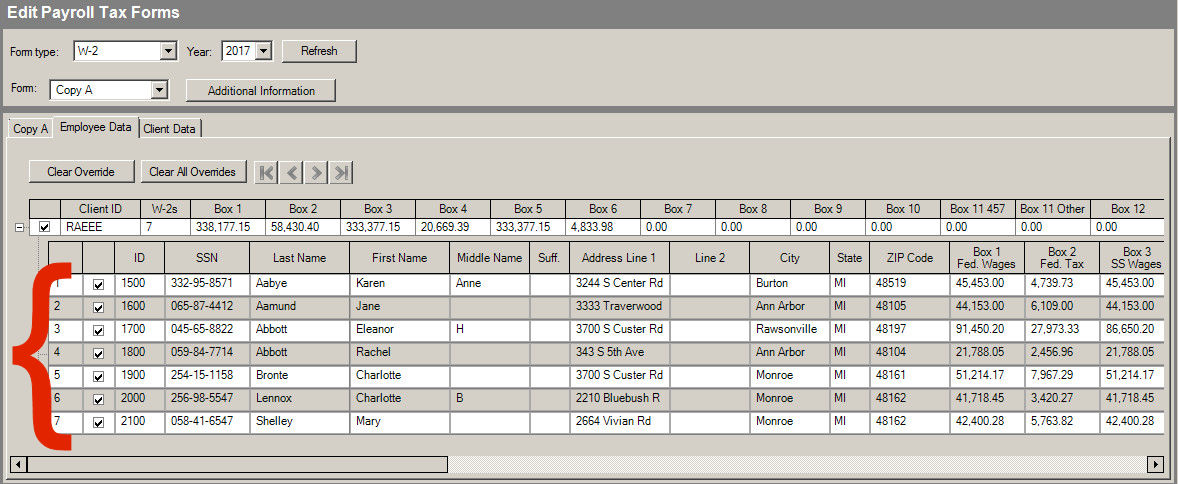
- In the Edit Payroll Tax Forms screen, select the appropriate client from the client drop-down list at the top of the screen (if not already selected).
- Select W-2 from the Form Type drop-down list.
- Specify the year for the forms you want to edit by selecting it from the Year drop-down list.
- Click the Refresh button.
Note: If the Do Not File checkbox is marked for a form in the Payroll Taxes tab, that form will not display in the Edit Payroll Tax Form screen.
- Use the Form drop-down list to select the form that you want to display.
- Click the Employee Data tab to view and edit information for individual recipients.
Note: Be sure to click the plus sign (+) next to the client ID to expand the record and then edit the information for individual recipients. Show me.
- Click the Client Data tab to view and edit any client information needed to fill out the form(s).
Notes
- Overrides remain indefinitely (quarter to quarter and year to year) until they are manually cleared. You can clear overrides in the Employee Data and Client Data tabs by using the buttons at the top of the tab.
- Clear Override. Clears the override in the field in which your cursor is placed.
- Clear All Overrides. Clears all overridden fields displayed on the active tab. (Overridden fields are displayed in red or with a red outline.)
- You have the option to clear form overrides and employee overrides in the Actions > Process Payroll Payroll Tax Forms screen prior to previewing or printing the forms.
- The Edit Payroll Tax Forms toolbar has a number of additional buttons, which are shown here and explained in the following table.

Button Function 
Process client forms.Click this button to open the Process W-2 Forms dialog, where you can choose to print all or selected forms applicable to the active client. 
Print current form. Click this button to print only the form currently displayed on the active tab to your default printer. Not generally used for processing forms, this button enables you to quickly print a hardcopy version for verification or other purposes. 
Calculate penalty and interest. Calculates penalties and interest for all currently selected forms based on your current system date. The button remains active (green) until manually toggled off or until the application is closed.
Was this article helpful?
Thank you for the feedback!

|
|

|
Get the most out of your Thomson Reuters Tax & Accounting products. Our continued learning packages will teach you how to better use the tools you already own, while earning CPE credit. Learn more. |

|
|

|
Chat - Best option for simple questions Call us at +1 800 968 0600. You might like to see our hours and menu options before calling |