
 myPay Solutions

This topic discusses File Exchange for myPay Solutions.
What is File Exchange
File Exchange is a secure file transfer option for myPay clients and referring accountants to use when communicating sensitive information. Personal Identifying Information (PII) should not be emailed or faxed to myPay Solutions under any circumstances. These forms of communication are not completely secure and personal employee or company data should be protected.
How do I get to File Exchange
- Log into to your portal.
- On the left, under Documents, click on File Exchange.
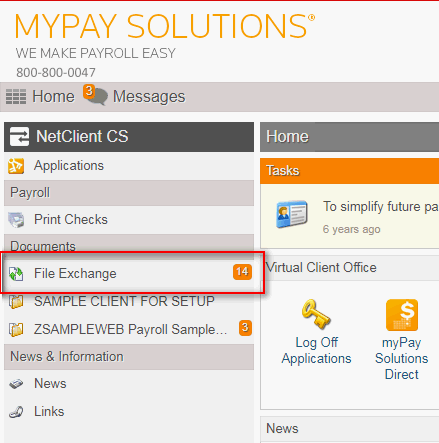
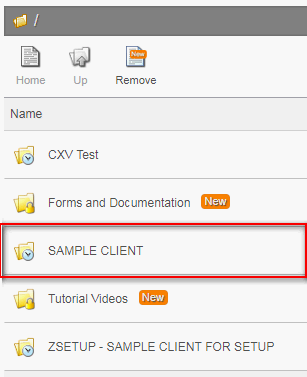
- Click on your company named folder. You will see the documents that are currently contained in that folder.
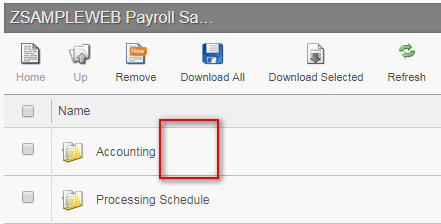
Menu Options
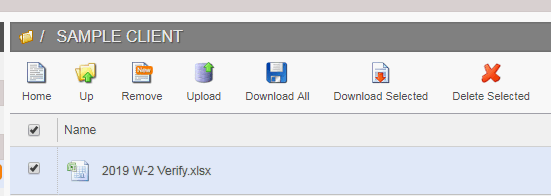
After opening your client folder, you will see a handful of icons at the top of the screen.
- Home - click this button to return to the Home portal screen.
- Up - click this button to move back a folder level.
- Remove - click this button remove the New tag from uploaded documents.
- New - click this button to see all of the newly uploaded files.
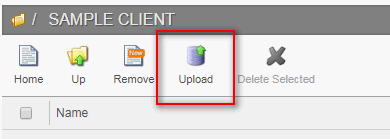
- Upload - click this button to upload new files to the portal.
- Delete Selected - click this button to delete files from the portal.
Files will remain in temporary folders for 14 days, after which myPay Solutions removes them automatically.
Uploading new files
Uploading a new file is quick and easy.
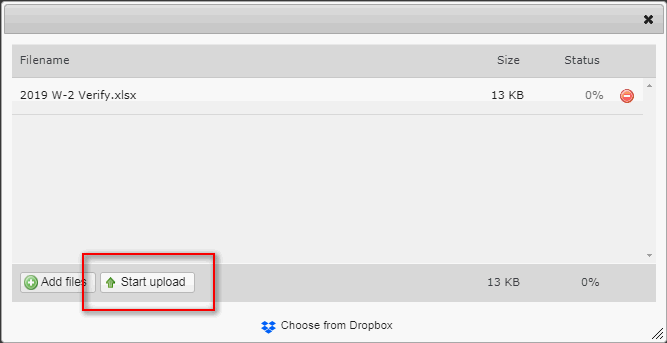
- Click Upload.
- Click Add files and then browse to your file.
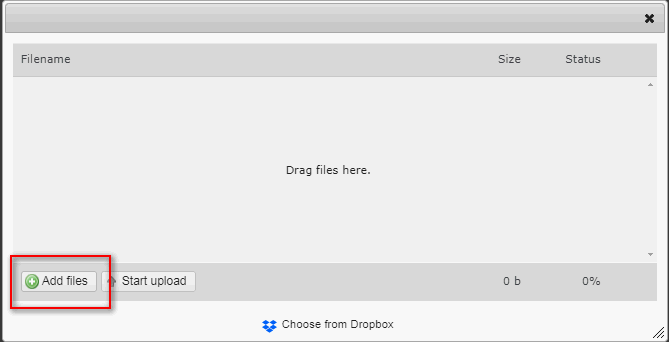
- Click Start upload.
- When the file uploads, you will see two dates: Expiration Date (when the portal will automatically remove the file) and a Date Modified (the date the file was uploaded).

Downloading files
Files your Payroll Specialist sends to you on File Exchange can easily be downloaded.
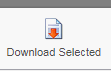
- Check the box next to the file you want to download.
- Click the Download Selected button.
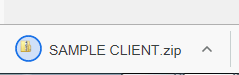
- A ZIP file will start to download to your Downloads folder (or web browser equivalent) on your computer. Open the file and inside will be the file submitted to you through File Exchange.
Deleting files
Files are automatically deleted from File Exchange after 14 days. However, you can manually remove a file when you are finished with it.
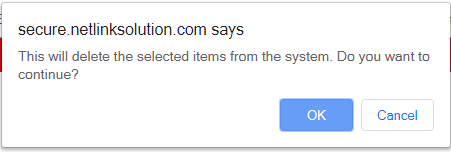
- Check the box next to the file you want to delete.
- Click the Delete selected button.
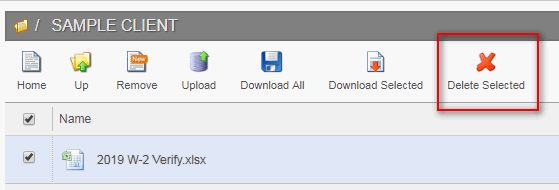
- A prompt will appear double-checking that you want to delete the selected file. Click OK.
Removing new tag from files
In the off chance that your Payroll Specialist uploads a few reports to your File Exchange and you do not need them after all, you can either delete them or wait for them to be deleted. If you wait, you may want to remove the New file tag that will show on all of those files unless you open them.
- Files with the New tag can have the tag removed without opening each file.
- Click the Remove button.
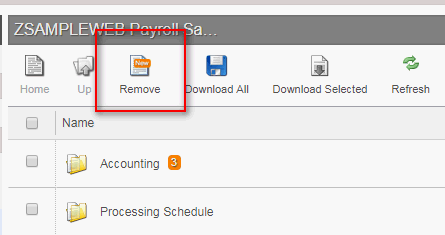
- A prompt will appear double-checking that you want to remove the new tag.
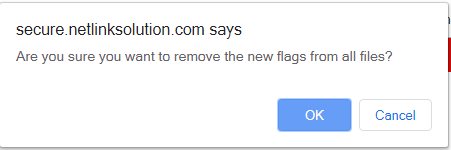
- Now the files show without the tag.
Was this article helpful?
Thank you for the feedback!