Correcting a Chart of Accounts that is out of balance

Show expandable text

We moved!

Help articles have been migrated to the new Help and Support. You can find help for your products and accounts, discover FAQs, explore training, and contact us!

The Workpapers CS application requires that all transactions you enter be balanced; therefore, there are very few ways your Chart of Accounts can become out of balance. The information below describes the possible ways to become out of balance and how to correct the problem.

Identifying that the Chart of Accounts is not balanced

There are three ways that the application will indicate an out of balance Chart of Accounts.

  1. The Enter Trial Balance screen displays the total amounts in red filled boxes on the bottom row. Show me.
    Enter Trial Balance screen total row indicating out of balance
  2. Reports (such as the Trial Balance - Detailed) will display "*OUT OF BALANCE*" beneath the total. Show me.
    Report total indicating out of balance
  3. When you attempt to close the year, a dialog will be displayed that says "All periods must be in balance to close the current year." Show me.
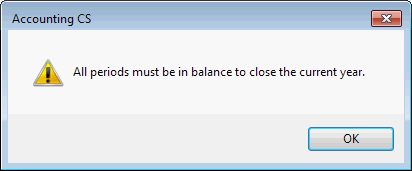
    Year end close dialog indicating out of balance

Scenario 1: Importing a spreadsheet

If you imported Beginning Balances from a spreadsheet that was not balanced before the import, your Chart of Accounts will also not balance. Use one of the following methods to balance your Chart of Accounts.

Note: If you imported Unadjusted Balances from an unbalanced spreadsheet, the application updates the 999 - Undistributed account with the difference so your Chart of Accounts remains balanced.

  1. Re-close the year and use the prior year ending balances as the beginning balances.
    1. Choose Actions > Change Posting Period.
    2. Select the last period in the previous year and then click OK.
    3. A dialog will be displayed that says "One or more accounts are out of balance in the current period. Do you want to continue?" Choose Yes.
    4. Choose Actions > Change Posting Period and choose a period in the current year.
    5. In the first year end close dialog, clear the Zero account balances checkbox.
    6. Complete the year end close process and verify that your Chart of Accounts is in balance.
  2. Re-close the year and zero the beginning balances.
    1. Choose Actions > Change Posting Period.
    2. Select the last period in the previous year and then click OK.
    3. A dialog will be displayed that says "One or more accounts are out of balance in the current period. Do you want to continue?" Choose Yes.
    4. Choose Actions > Change Posting Period and choose a period in the current year.
    5. In the first year end close dialog, mark the Zero account balances checkbox.
    6. Complete the year end close process and verify that your Chart of Accounts is in balance.
  3. Manually edit the beginning balance for any accounts with an incorrect balance.
    1. Choose Actions > Enter Trial Balance.
    2. Locate an account with an incorrect balance in the Beginning Balance column, or the Unadjusted balance column.
    3. Highlight the incorrect amount, and then use your keyboard or the on-screen calculator to enter the correct amount.
    4. Repeat the previous step for any other accounts with incorrect balances.
    5. Verify that there are no more out of balance indicators displaying in the total row.

Scenario 2: Manually updating amounts on Enter Trial Balance

The Actions > Enter Trial Balance screen allows you to modify an account's beginning or unadjusted balance. However, the application does not require you to offset this change in activity nor does the application automatically balance your Chart of Accounts. Use one of the following methods to undo or correct the change that was made.

  1. Locate the account on the Enter Trial Balance screen with an incorrect amount and change it in the Unadjusted balance column.
  2. Find the activity transaction on the Enter Transactions screen.

    If you find that a client's Chart of Accounts is out of balance in the Actions > Enter Trial Balance screen, follow these steps to find and then correct the missing account number.

    1. Choose Actions > Enter Transactions.
    2. If necessary, choose the appropriate posting period and journal in the filter fields in the upper-right corner of the screen. To see all transactions for all periods, click the Delete button button in the filter fields to clear all filters.
    3. Click the Drop-down button button in the Search field in the upper-left corner of the screen. Click Search Fields in the context menu that appears, and verify that there is a checkmark by the Account(s) option.
    4. Enter Unassigned in the Search field, and then click the Search button button in the field to start the search.
    5. The application displays all transactions that have one or more distributions that are not assigned to a GL account. Delete the transaction record, or note the GL accounts that need to have a corresponding amount, and then update the appropriate account on the Enter Trial Balance screen.

Was this article helpful?

Thank you for the feedback!