We moved!
Help articles have been migrated to the new Help and Support. You can find help for your products and accounts, discover FAQs, explore training, and contact us!
If your clients use QuickBooks Online, Workpapers CS enables you to import Account Balances and chart of accounts data for processing in Workpapers CS.
Choose File > Import > QuickBooks Online.
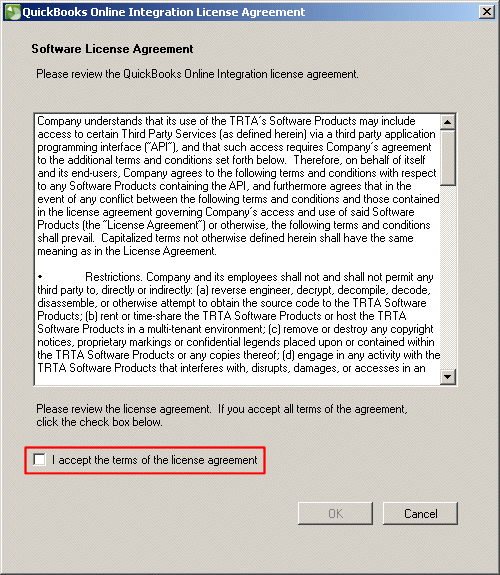
Note: The first time you choose this command, the application will prompt you to agree to the terms of the QuickBooks Online Integration license agreement. You must read the agreement and mark the I accept the terms of the license agreement checkbox to continue.
Fields & buttons
Select the client for whom you want to import QuickBooks Online data.
- Connect to QuickBooks / Disconnect button. Click the green Connect to QuickBooks button to open the Intuit login screen in Microsoft Edge. Sign in with your email address/User ID and password. Once you are logged in, select the appropriate company name and then authorize Workpapers CS to access the data.
If you mark the Remember me checkbox in the login screen, Workpapers CS will remember your email address/User ID. Once you connect to QuickBooks Online, Intuit sends a security token to Workpapers CS, and that token is valid for 180 days. However, after 159 days, Workpapers CS automatically attempts to re-authorize the token.
While you are logged in to QuickBooks Online, the label for the Connect to QuickBooks button changes to Disconnect. When you click the Disconnect button, the application logs you out of the client's QuickBooks Online account and no longer remembers the login credentials.
- QuickBooks Online company name. Once you log in and authorize Workpapers CS to access the client's data, the application displays the QuickBooks company name here.
Choose the data types to import. By default, Workpapers CS does not import inactive items. To include inactive items with the import data, mark the Include inactive checkbox.
- Balances. Mark this checkbox to import the total balance of the client's transaction data for the date range selected. A single balance for each account is imported. (For example, if there are three journal entries/checks that affect account 100, then the total of those three entries is imported for that account.)
Note: When the Balances checkbox is marked, the chart of accounts checkbox is marked by default and cannot be cleared (grayed). The Include inactive checkbox is cleared by default and can be marked, if required.
- Chart of Accounts. Mark this checkbox to import the client's chart of accounts data.
- Import date range. Specify the date range for which you want to import data. If you previously imported data for this client, the application displays the date range of the last import in the Previous import date range field.
Note: If you find that you need to re-import certain data that you previously imported, Workpapers CS allows you to do that. You must first delete the affected imported balances from Workpapers CS and then re-import the balances using the same date range as before. Workpapers CS will import only new or changed balances within the previously used date range.
- Retrieve Data button. Click this button to retrieve the client's data from QuickBooks Online. After Workpapers CS retrieves the data, it opens the QuickBooks Online - Manage Data dialog, where you can map the items that you are importing to new or existing items in Workpapers CS.
- Manage data. Opens the QuickBooks Online - Manage Data dialog without retrieving the data from QuickBooks Online. This enables you to see prior import mappings and re-map items as necessary for future imports.


 Workpapers CS

