


We moved!
Help articles have been migrated to the new Help and Support. You can find help for your products and accounts, discover FAQs, explore training, and contact us!
Use the Rules dialog to set up Accounting CS to automatically assign a specific value to the reference, description, type, vendor, 1099 item, and/or GL account for retrieved transactions that meet the criteria you define. For example, you can set up a rule to assign a specific vendor to all transactions with a certain description.
You can set up an unlimited number of rules for each client, and those rules are available to all of the client's bank accounts for which you retrieve bank feeds data.
You can access the Rules dialog from the Bank Feeds portlet using any of the following methods.
- Click the Rules link in the bottom-left corner of the screen.
- Right-click a transaction in the Retrieved Transactions grid and choose Add Rule.
- Right-click a transaction in the Retrieved Transactions grid for which a rule has already been applied and choose Edit Rule.
- Right-click a transaction in the Retrieved Transactions grid for which a rule has already been applied and choose Delete Rule. The application prompts you to confirm that you want to delete the rule. Click Yes to delete it and go to the Rules dialog, or click No to go directly to the Rules dialog, without deleting the active rule.
Each time you retrieve transactions for the selected client, Accounting CS applies the rules to any retrieved transactions that have not yet been saved.
Note: Accounting CS does not apply rules to transactions that have already been retrieved and saved. When you save retrieved transactions, the application locks those transactions, even if you didn't yet approve them. If you set up a new rule after you have retrieved and saved transactions, the application applies the rule to only new transactions; it will not retroactively apply the rules to saved transactions. If you retrieve a transaction but do not save it, and then you retrieve the same transaction in a subsequent retrieval, the application considers that a new transaction and will apply the rule to that one.
Fields & buttons
Example
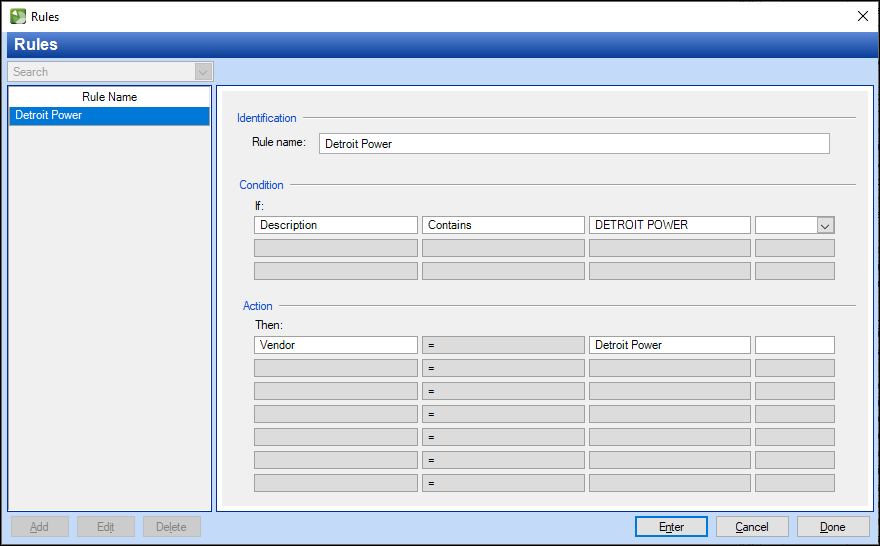
To assign the Detroit Power vendor to all retrieved transactions with a DETROIT POWER description, set up the condition and action as shown in the image below.
Was this article helpful?
Thank you for the feedback!

|
|

|
Get the most out of your Thomson Reuters Tax & Accounting products. Our continued learning packages will teach you how to better use the tools you already own, while earning CPE credit. Learn more. |

|
|

|
Chat - Best option for simple questions Call us at +1 800 968 0600. You might like to see our hours and menu options before calling |