We moved!
Help articles have been migrated to the new Help and Support. You can find help for your products and accounts, discover FAQs, explore training, and contact us!
There are a number of steps to take to ensure a smooth conversion of client data from Trial Balance CS and Engagement CS to Workpapers CS. When you are ready to convert your data, we recommend that you first convert one or two of your smaller, less complicated clients to familiarize yourself with the conversion process and with the Workpapers CS application.
Note: For a higher-level roadmap describing the transition process, from purchase through client data conversion to post-conversion training, refer to Transitioning from CSA to Accounting CS services.
When converting Engagement CS, you will need to create staff logins for all users that exist in Creative Solutions Accounting. You will need to map the staff during the conversion process. Please note that assignments to staff who are no longer set up in Engagement CS will convert as unassigned.
Pre-conversion steps
In CSA, choose File > Open Client and open the client you are preparing to convert.
- Verify that each CSA client is in the latest processing period. (Details)
Choose File > Client Properties and verify that the latest processing period is selected on the Trial Balance tab.
Note: If the client's current period-end dates are before the latest period-end dates, you can choose File > Select Period to Process to advance the client to the latest period.
- Verify that each CSA client has a valid address. Choose File > Client Properties and verify the address is valid.
- Verify the account numbers. (Details)
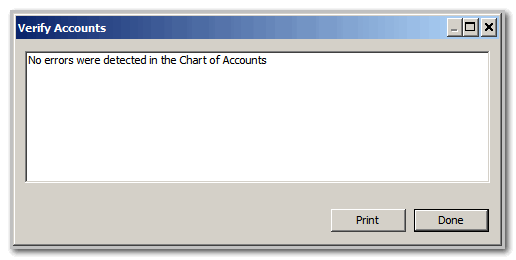
In the Setup > Chart of Accounts screen, choose Edit > Verify Accounts to check for duplicate account numbers. Address all errors listed in the Verify Accounts dialog before proceeding with the conversion.
- Compact the client data. (Details)
- Choose Help > Repair.
- In the Clients tab, highlight the client to convert, and then click the Compact Client button.

- Compact the global database. (Details)
- Be sure that all users are logged out of CSA.
- Choose Help > Repair.
- Click the Miscellaneous tab and then click the Compact Global Database button.

- Restore archived engagements (Details)
To include any archived engagements in the conversion, choose File > Archive > Restore in Engagement CS and follow the steps to restore an archived engagement.
- Clear the option to compress/secure engagement files. (Details)
If the Compress/Secure engagement files checkbox is marked in the Help > Repair > Clients tab in CSA, clear the checkbox, and then open and close each client prior to converting.

Conversion steps for screens in the wizard
After you complete the pre-conversion steps, you are ready to convert your client data.
In Workpapers CS, choose File > Import > CS Professional Suite Accounting Products Conversion.
Depending on the modules that are enabled for the client you are converting, you may not see all of the screens described below.
Note: The client you are converting must be closed in CSA before beginning these steps. Accounting CS will notify you if the client is currently open in CSA.
- Source Data: Select the locations where your CSA system and client data files are stored.
Show screen.
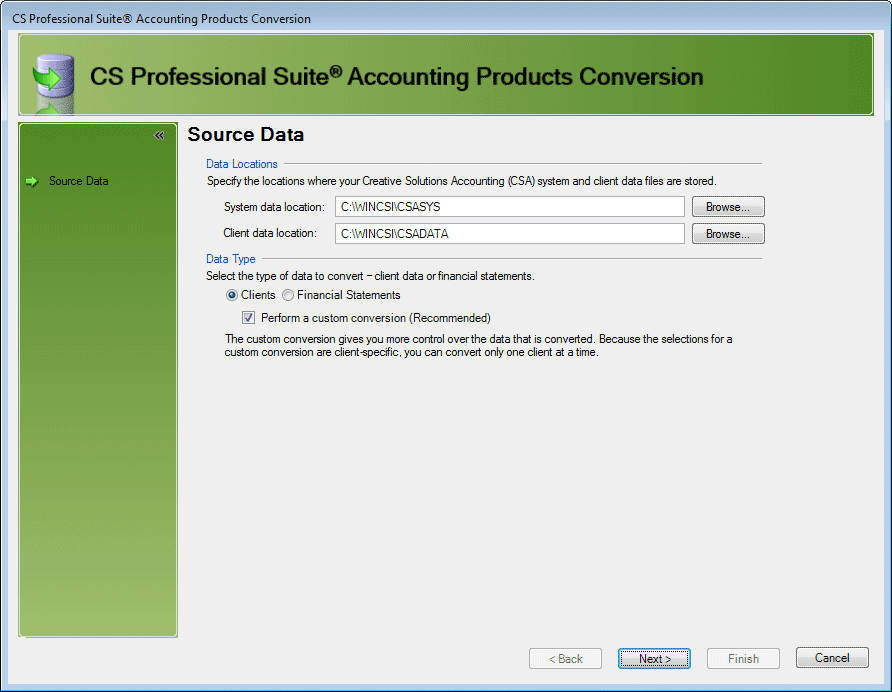
- Specify the locations of your CSA system and client data files.
- If you did not specify the CSA data locations in the Setup > File Locations dialog, click the Browse button to locate the CSASys (system data) and the CSAData (client data) folders within the WinCSI folder.
Note: To find the CSAData folder location, choose Setup > User Preferences and click the File Locations tab in CSA. In most cases, the CSASys file resides in the same location. For Virtual Office and SaaS users, the CSAData and CSASys folders are located on the Y:\ drive.
- In the Data Type section, choose the Clients option to convert client data.
Note: If you will be converting financial statements, you must convert them in a separate conversion after the client data has been converted.
- Mark the Perform a custom conversion (Recommended) checkbox to convert data for a single client and review all of the mapping screens (recommended method). If you have many clients with only the General Ledger module enabled, you can clear the checkbox to perform a batch conversion. Note that some of the data that is converted via a custom conversion will not be converted via the batch method.
- Source Data - Clients: Select the CSA client to convert.
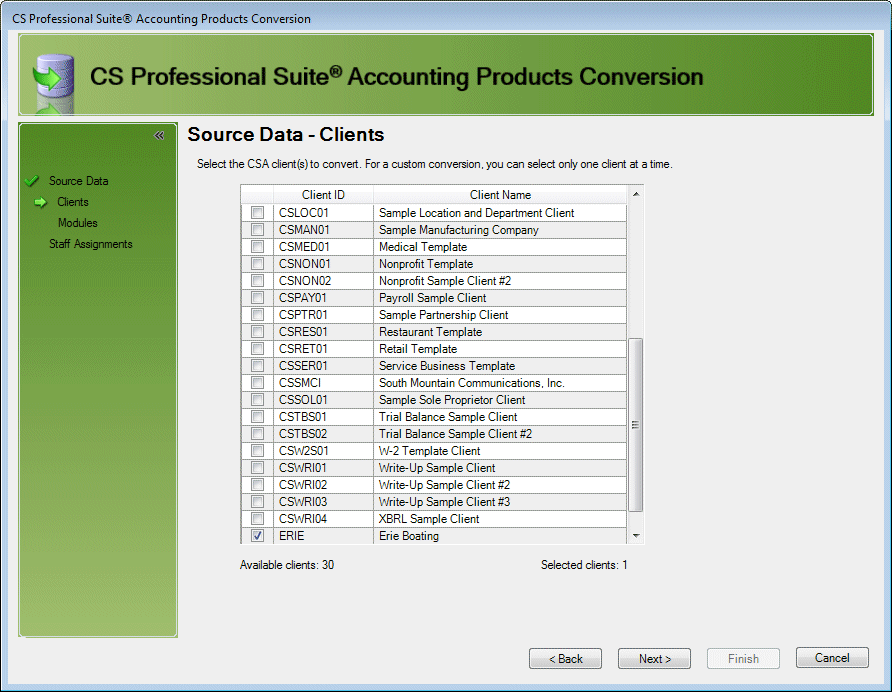
Mark the checkbox next to the client to convert. If you do not see your client listed, click the Back button to go back to the Source Data screen and modify your data locations.
If you still do not see your client, click Cancel and exit the conversion. Choose Setup > Clients and verify that the client ID of the client you want to convert is not already being used in Accounting CS. If it is being used, highlight that client and then change the client ID or delete the client record.
Workpapers CS automatically includes a client that is assigned a Firm ID of FIRM. This client includes some functionality that is not available to clients that you add to the database. Workpapers CS does not allow you to convert client data into an existing Workpapers CS client; therefore, you will not be able to convert your firm's CSA data into the FIRM client. You can, however, convert your firm's data into a new client. If you want to use the FIRM client for your firm's data, we recommend that you use the spreadsheet import feature to manually bring your firms's data into the FIRM client.
See also: Transitioning firm client data from CSA to Accounting CS
After verifying that the data locations are correct and the client ID does not already existing Accounting CS, open the client in CSA and then choose File > Client Properties. Click the Add/Remove modules button and verify that the Trial Balance checkbox is marked.
- Modules: Specify the types of data to convert for each CSA module.
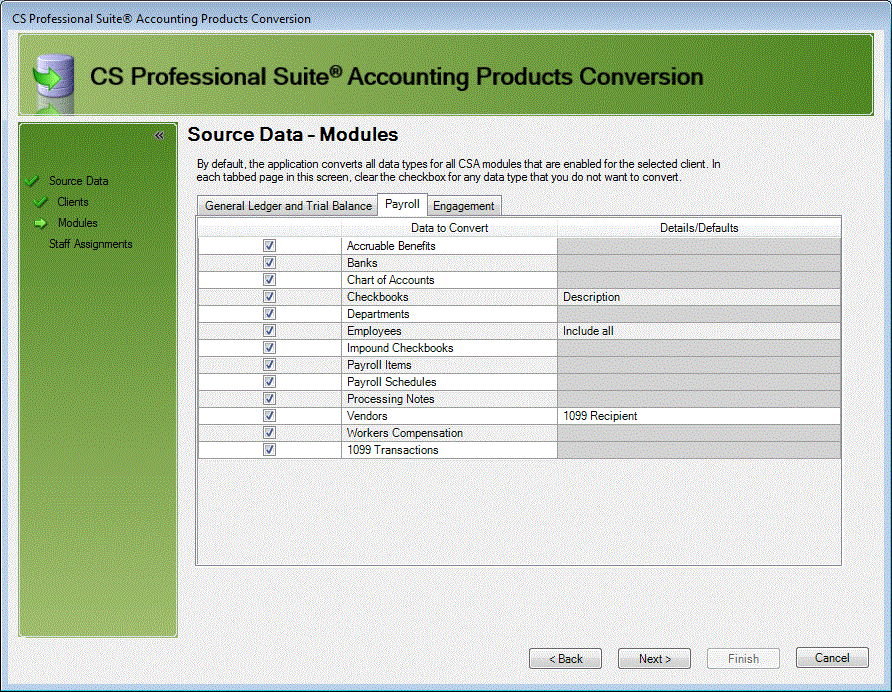
This screen includes a tabbed page for each CSA module that is enabled for the client. By default, all items are marked to be converted. You can unmark the checkbox for any items that you do not want to convert.
- Data Mapping - Staff: Map each staff member in CSA to the corresponding staff member in Accounting CS.
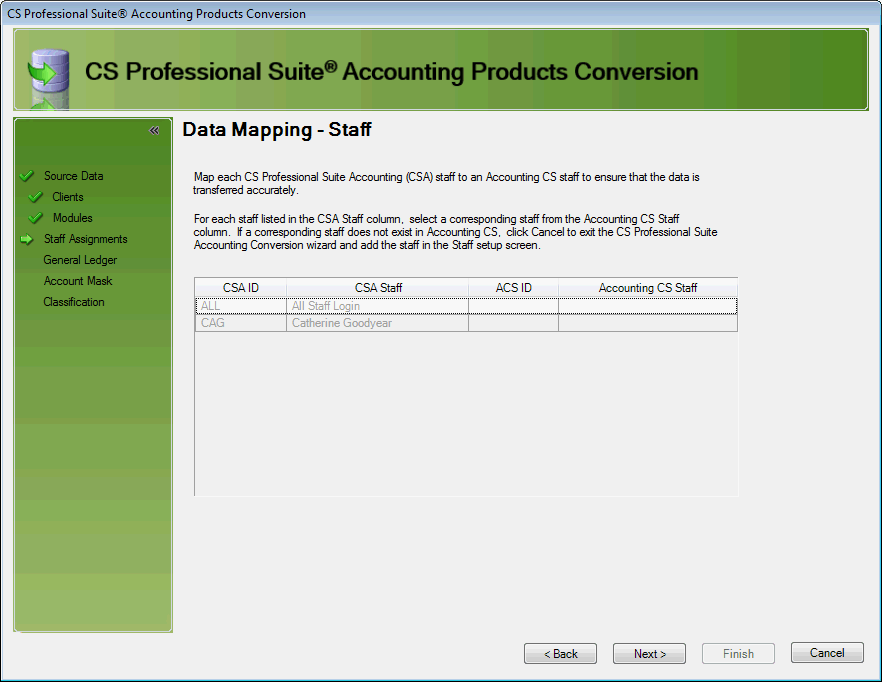
Each Staff member that was set up in CSA as Engagement CS user must be mapped to an existing Workpapers CS staff member. You can set up staff members in the Setup > Firm Information > Staff tab in Workpapers CS.
- Client Setup - Accounting Information: Select the GL account to use for undefined or missing GL account numbers.
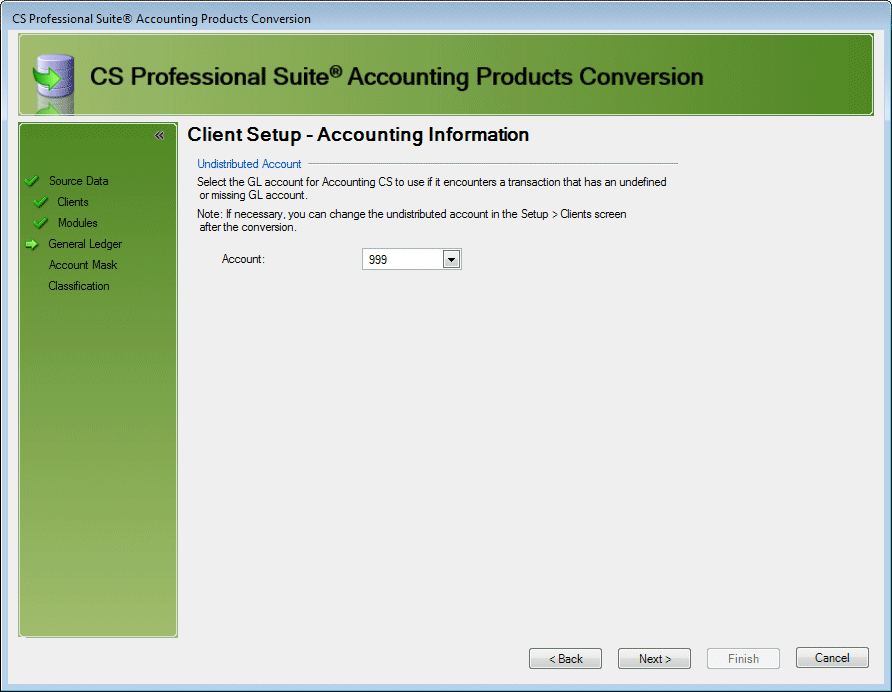
Select the account from the client's Chart of Accounts to use as the undistributed account. If left blank, the application automatically assigns account 999 (and creates it if the account does not already exist).
Note: If necessary, you can change this selection after the conversion in the Setup > Clients > Accounting Information tab.
- Client Setup - Account Mask: Verify or modify the account mask to use for this client in Accounting CS.
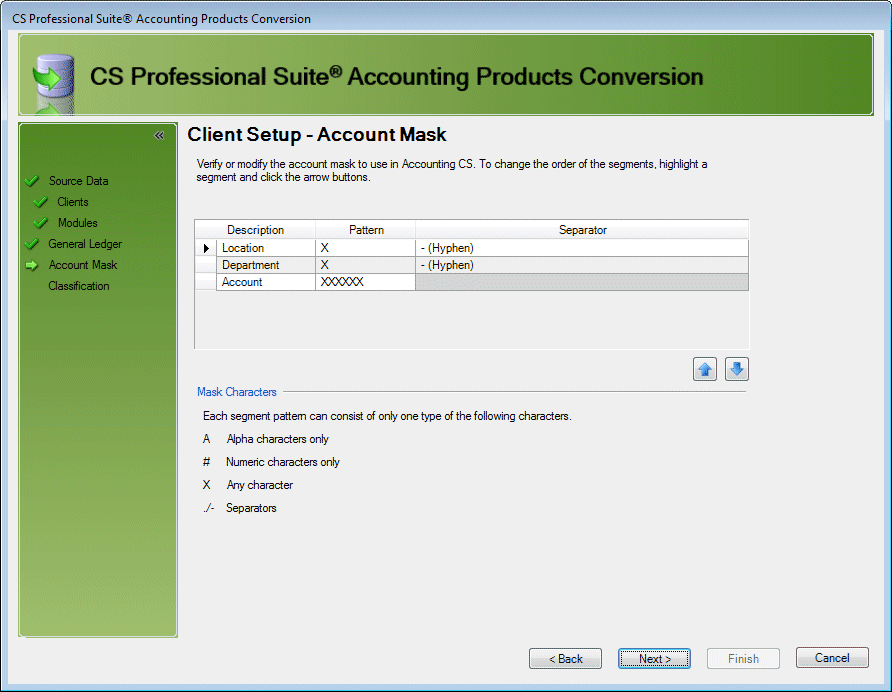
If you use a segmented Chart of Accounts for the client in CSA, you can use this screen to change the order in which the segments are used. You can also add and change separators here, but you cannot change the length of the mask.
- Chart of Accounts - Classification Assignment: Choose the method to use when assigning classification codes and subcodes — account groups or grouping schedule.
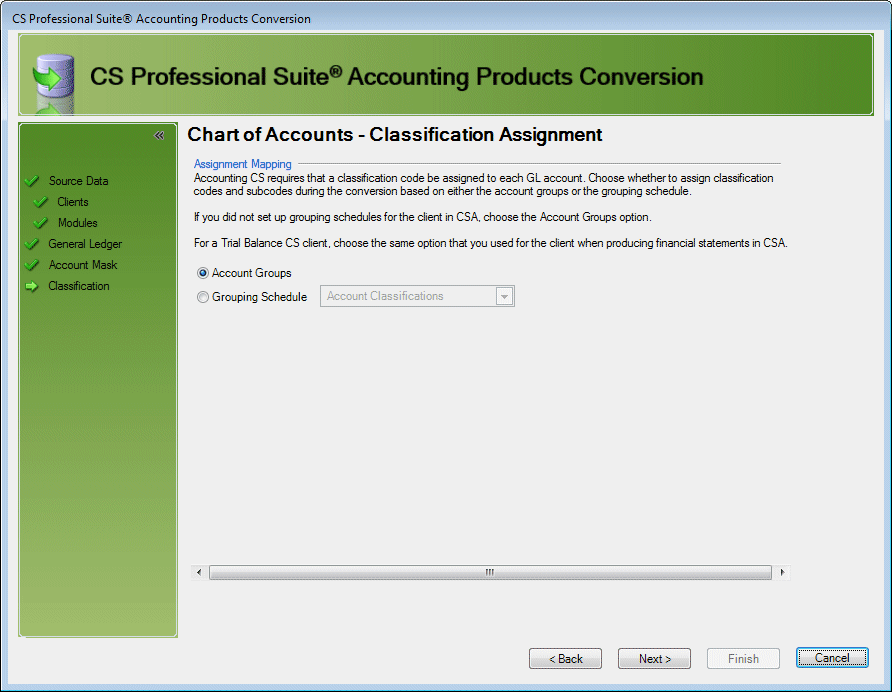
- Workpapers CS uses the Chart of Accounts classification codes and subcodes to determine which accounts to include in the financial statements and to group similar accounts together to compare balances. Use this screen to choose the grouping schedule used for the client in CSA to map to the classification codes and subcodes.
- Generally, if you did not use Trial Balance CS you will want to choose the Account Groups option. If you did use Trial Balance CS, choose the Grouping Schedule option and then select the grouping schedule you used when creating the client's financial statements.
- Chart of Accounts - Classification: For each CSA account group, verify or select the corresponding Workpapers CS classification code and subcode.
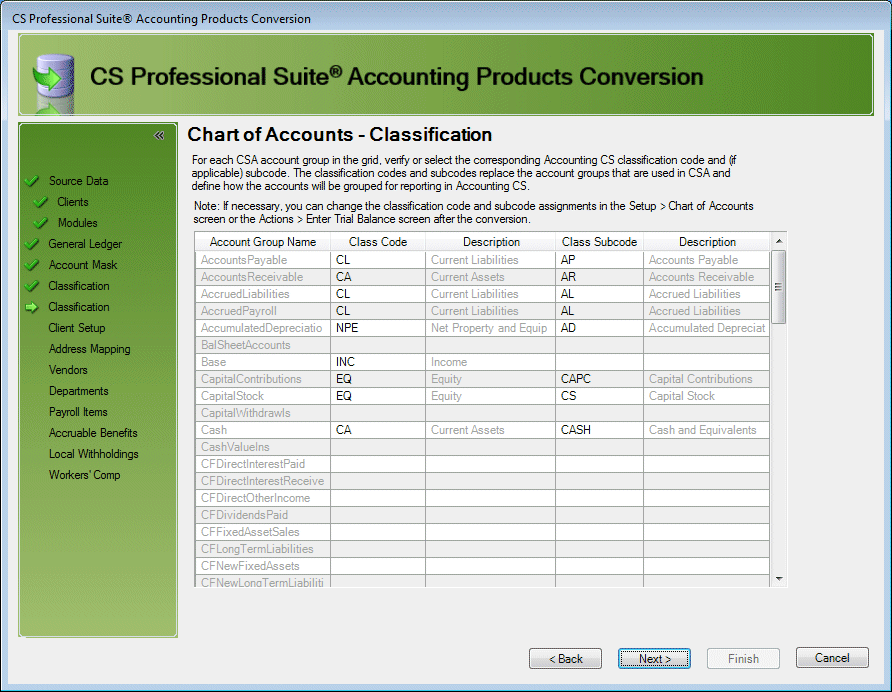
- This screen opens if you chose the Account group option in the previous screen. Map the grouping used in CSA to the account classification in Workpapers CS.
- You can assign classification codes and subcodes to accounts at any time after conversion in the Setup > Chart of Accounts or Actions > Enter Trial Balance screens. Because Workpapers CS uses the classification codes and subcodes to determine which accounts to include in financial statements, we highly recommend that you address the classifications here.
- Chart of Accounts - Grouping Schedule To Classification: For each CSA grouping schedule code/subcode, verify or select the corresponding Workpapers CS classification code and subcode.

- This screen opens if you chose the Grouping schedule option in the previous screen. Map the grouping schedule codes used in CSA to the corresponding account classification codes in Workpapers CS.
- You can assign classification codes and subcodes to accounts at any time after conversion in the Setup > Chart of Accounts or Actions > Enter Trial Balance screens. Because Workpapers CS uses the classification codes and subcodes to determine which accounts to include in financial statements, we highly recommend that you address the classifications here.
- Progress and diagnostics: View a progress bar as the conversion progresses and a diagnostic report upon completion of the conversion.
- After you click the Finish button, a conversion progress window opens. Show me.
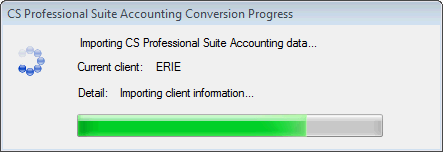
Keep in mind that as you convert larger clients with more data, the conversion will take longer. Clients with engagement data will take the longest to convert.
- When the conversion is complete, a Diagnostics dialog opens. The diagnostics alert you to any pieces of information that need to be addressed in Accounting CS.Show me.
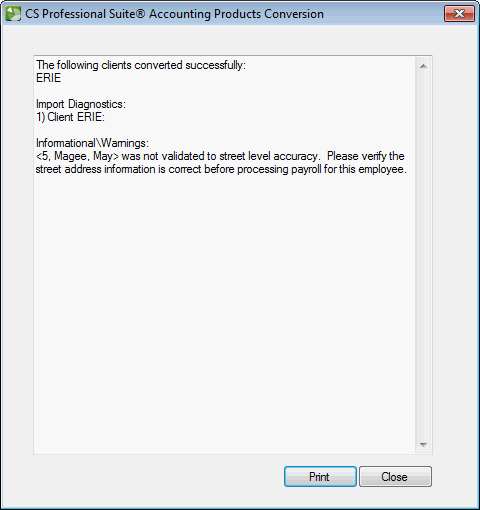
You can print the diagnostics information in the dialog for future reference.
See also: Common conversion diagnostics
- After you click the Finish button, a conversion progress window opens. Show me.
Post-conversion steps
It is imperative that you verify that the information from CSA converted accurately to Accounting CS. After the conversion, we recommend that you take a couple of steps to ensure that client data converted properly.
- Address any diagnostics that were encountered during the conversion.
- We also recommend the following reports for data comparison after conversion.
CSA Reports Workpapers CS Reports Client Information Report Client List Adjusting Journal Entry Adjusting Journal Entries Trial Balance Worksheet Trial Balance Worksheet or Trial Balance - Condensed or Detailed
Note: Converted client data remains intact in CSA. If the converted data cannot be verified for accuracy, you can delete the client in Accounting CS and then go back to the CSA client data to repair and reconvert it.
For Engagement clients utilizing integration with SMART Practice Aids: See Converting and linking an Engagement CS client with SMART workpapers into an Accounting CS Workpapers binder for additional steps to maintain the engagement binder link with the engagement in PPC's SMART Practice Aids.
Data not transferred
Workpapers CS and CSA are built on different platforms, which can prevent the following items from being converted.
- Archived engagements
- Engagement binder properties and history
- Local client data
- Certain transaction types
- Transmittal letters
- Certain Microsoft Word and Excel formulas
For details on data that is not converted, refer to the PDF guides listed below.
Training Video
Video: Engagement CS to Workpapers CS Conversion Tutorial
PDF guides
All of the above information and more can be found in our PDF conversion guides at the following links.
Creative Solutions Accounting to Accounting CS
Payroll CS to Accounting CS Payroll
Was this article helpful?
Thank you for the feedback!
The General ledger report is not available for WPCS users. Development may consider making it available to WPCS users if they are requesting it (send them to Ideas Community). If a WPCS only user calls asking for a GL report, you will need to rename the GL report to something slightly different, and then export it and email it to the user. They can then import the report and run it like normal.


